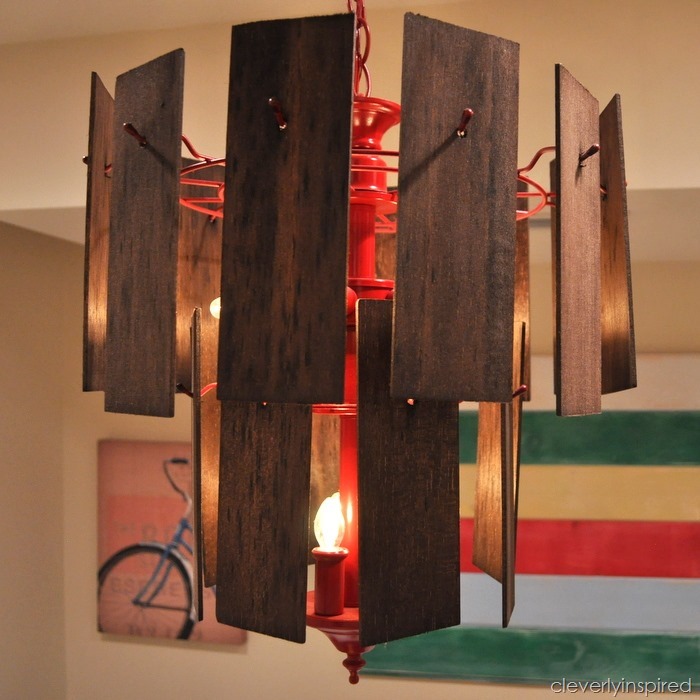
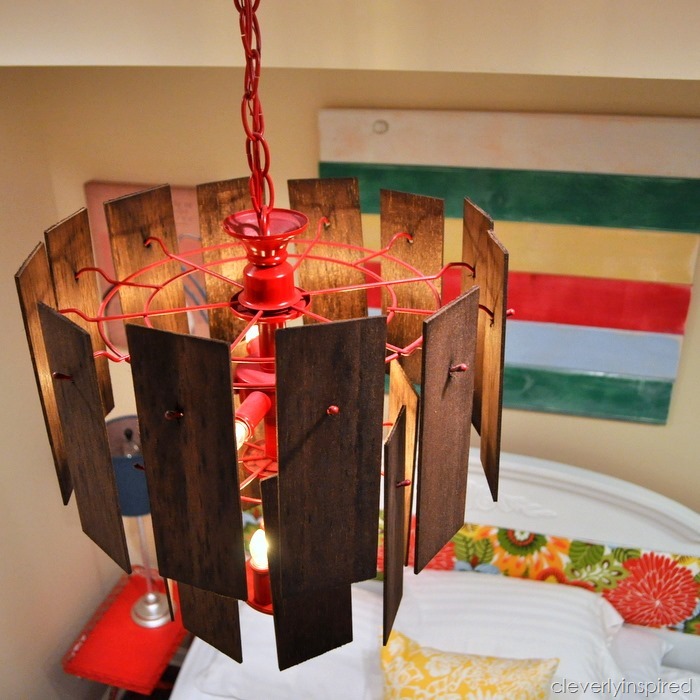
Morning yall!! How was your weekend? We had nothing to do and it was perfect:) Wanted to share with you this ceiling light from the guest room….it turned out so unique and it was super easy to do.
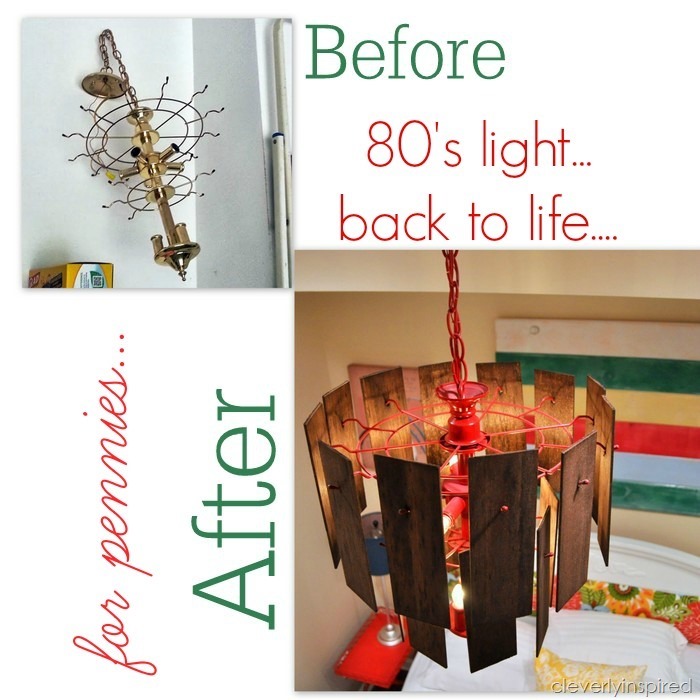
This old ceiling light was a steal at my local Restore (habitat for humanity thrift shop). I bought it for $10 and it hung in my garage forever. I contemplated donating it back…unsure of what would become of it. When I was doing the garage makeover…I had just about given up on coming up with a good use for this light. I am so happy I decided to be patient until this idea popped in my head….and now this little 80’s light is singing a new tune….
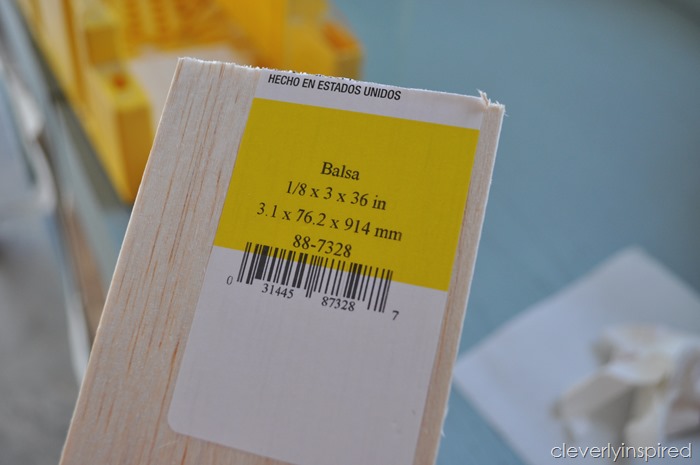
This light came with 25 glass panel pieces. My original thought was to cover those pieces with some fun cardstock (like an old map maybe) which would have been very cool. However I wanted to bring another texture into the space…and that is when I started to think of using wood. These balsa pieces are inexpensive, lightweight, and can be finished with any paint or stain you desire. I found mine at Michael’s. I wanted to bring the darker tones of the floor into the light…so I used stain…however.. I think it would be so cool to paint these too…the possibilities are endless and vast. (sorry for the run-on sentence….it is my thang and all….:) I love that:)
Here is how I went about updating this fun new light….
Supplies:
One light in need of love
4 pieces of 36inch balsa wood (mine were 1/8 by 3inches) I cut them down based on my glass panels that came with the light. Measure your accordingly. The 1/8” thickness is perfect for this.
Miter box
Hand saw (fine teeth blade is best)
Drill with bit to make a hole
Spray paint of choice ( I used Gloss red)
Minwax stain (espresso)
Sponge brush
rag
Steps:
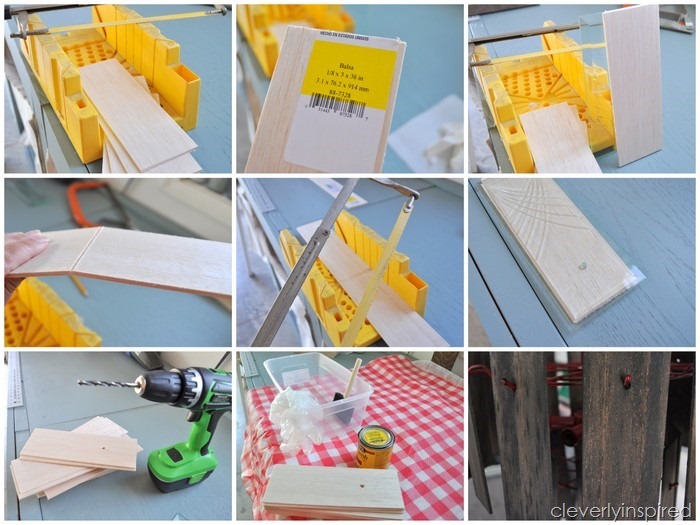
* First I sprayed 2 coats of paint on the base of the light. Let dry
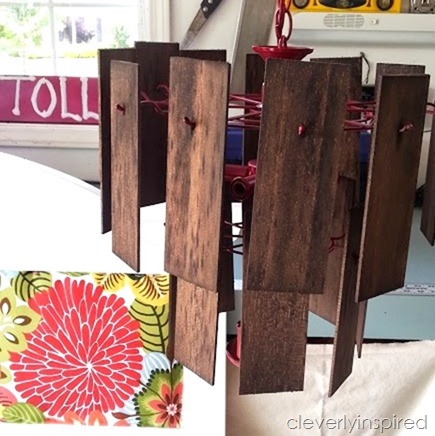
* Take the balsa wood and make your cuts. I measured the glass panels that came with the light and cut them accordingly. I found it easiest to use the miter box to get a straight cut. I sawed through more than half way and it would split apart easily. (hope that makes sense)
* Measure with a pencil where to drill your hole on each piece of wood.(again, using the glass panel as a guide)
* Once you have your wood cut and holes drilled you can stain the front and backs (be sure to get in the hole crevices and sides). Coat with stain and wipe the stain off with a rag.Place on the light to let dry.
* Install your light and install your bulbs. I used small 6 watt bulbs (like the kind you use for window lights at Christmas time) in mine to be sure it wouldn’t get the wood too hot. It is plenty of light for this small space (plus I have recessed lighting in this space too)
I absolutely love how this light came out!
So here is the lesson for today…never walk away from a $10 light from the 1980’s that is speaking to you…You will come up with some way to use it…I promise:)
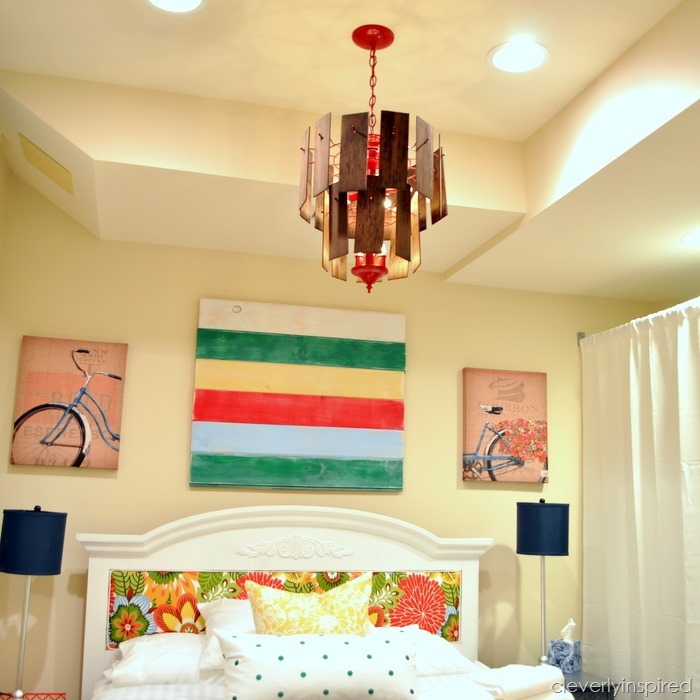 More guest room coming soon (this room is a BEAR to photograph!!!!)
Where I share fun ideas:
BeDifferentActNormal, The36thAve, Whipperberry, TipJunkie, Tatertots&Jello, TodaysCreativeBlog, SerenityNow, PositivelySplendid, ByStephanieLynn, TheDIYClub, CRAFT. MadinCrafts. HomeStoriesAtoZ,


Wow! This looks amazing! I’d love for you to link up to The DIY’ers. http://homecomingmn.blogspot.com/2013/08/the-diyers-and-last-weeks-top-three.html
Very Cool!! Love the way it came out. Looks so good.
What a great upcycle! Love it and just pinned!
Love the upcycle. Who’d figured … wood!
Thanks!!!