")
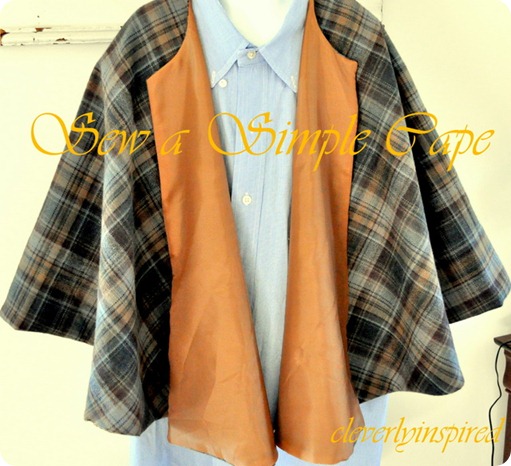
I’m not kidding when I tell you I made this last winter….and I am just now getting to tell you about it. I waited too long to write the post …and then it was past the season— so I thought I would wait until this fall. This project is a fabulous beginner sewing project. Straight stitch…nothing too fancy…and it can be made to fit anyone. I made this one for me…but the peanut uses it too. Here is how you can sew your own simple cape…..

The fabric I choose was 54 wide ( my finished arm length is 19.5 inches)….so when you go into JoAnn or where ever you go to get your fabric…look for the longer bolts of fabric. This is a “suiting” fabric….tweeds work great too…just pick something that isn’t too heavy….and not too bulky…because you will be lining it and you want to fit it into your machine. You do NOT pre wash this fabric…if something gets on this….just have it dry-cleaned—as you would a suit.
")
Lay the fabric flat on a large work surface.(pic1) Fold the fabric into 4ths….meaning fold it in half and then in half again. Be sure that all edges are even and the corner is square. Measure from the corner out to the “arm” length (pic2). Mine is the entire length of the fabric. Hold the measure tape at the corner and trace with chalk the radius from that point (pic 3). This will give you your cutting line. Pin all layers and cut. From the corner….mark with chalk 2.5 inches for the “neck”…pin and then cut the corner out with shears. (pic4) . Spread fabric into the circle shape and choose a place to cut from the outer edge to the neck. This will be the front of your cape.
Repeat with your lining fabric (mine is a lightweight satin)
")
Pin the right sides together matching edges and pinning. A large work surface is key to having it all line up. Leave a 4-5 inch opening on the outer edge to be able to turn fabric inside out.
")
Sew a straight stitch around the entire circle…leaving your opening. Trim your material and turn right side out and iron your edges. Fold in the opening and iron…then straight stitch to close the seam. You can choose to do a closure of some sort….I sewed on a small snap in the front to prevent it from slipping off when I am wearing it. This is more of an “accessory” like a scarf…so you don’t need the closure if you don’t want to fool with it.
")
Dude…you just sewed a cape!! Stand up and do the happy dance!!!
")
")
Sharing at tatertotsandjello
tip junkie
today’s creative blog

This is lovely in a plaid, but you could also make it for kids (or yourself) in sweatshirt material or polarfleece as a great layer for fall and winter sports, or line it with polarfleece.
I love this cape!! The fabric is beautiful. TFS!! Stopping by from Tatertots and Jello linky party and your newest follower.
Here is what I shared this week: http://craftybrooklynarmywife.blogspot.ca/2012/09/another-fur-baby-coat.html
I love it! I think my daughter would love it in pink!