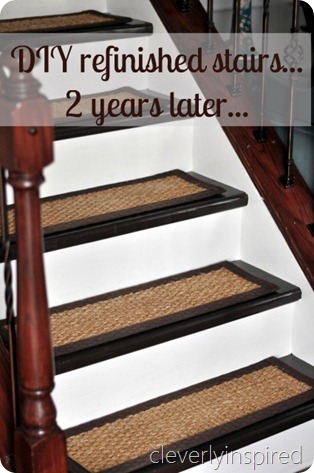
It is a question that has come up more than once…how do your stairs look now?? Almost 2 years after you finished them?? Well…I will show you…

It was one of my first major home DIY projects and it landed me in blog land when I completed it. I published a very simple step by step video about how we went about refinished our stairs.
Here is the Youtube…(gosh….I look a bit crazy in this clip…sorry for the crazy face…People with strong character laugh at themselves right,,,,say yes please…ha!?!?!)

We could not be happier with our stairs. The finish of the paint is still perfect. We did choose to put sisal rug pads on the stairs. But even so…the paint hasn’t chipped anywhere. They look as great as the day we finished them. Here are some answers to your questions….if I failed to answer your question please comment and I will reply ;)
Q.: Why did you use latex paint and not oil based or a stain?
A.: We didn’t want to match up (or attempt to match up) the railing stain. It would have come out too red or too brown. With that said we decided to use a true brown paint. The color is Sweet Molasses by Behr. We used a semi gloss latex. When that dried, 3 coats of poly was applied.

Q.: How did you use your stairs while you were finishing them?
A.: Once we were ready for paint…I painted a coat first thing in the morning…starting from the top down. I stayed off the stairs all day. By evening they were fine to walk up with socks (just to go to bed..) we tried our best to stay off them. The next morning I did the same thing. When we were ready for poly…I did every other stair. That way I could go up and down (think before you step…haha!) And then I repeated with the other stairs.

Q: Where did you get the sisal carpet treads?
A: Natural area rugs .com Several options available. We held ours down with carpet tape.

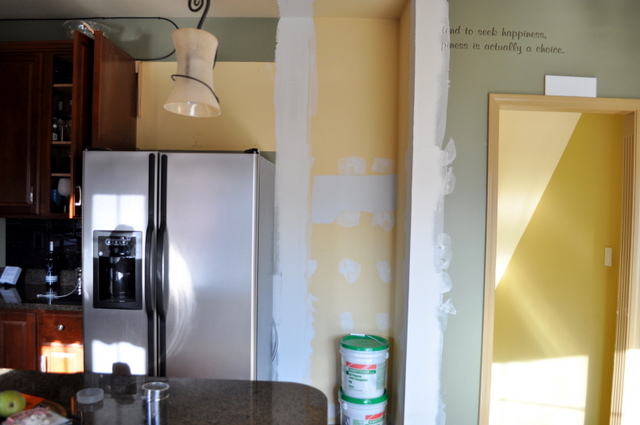
Q: How did you complete the stairs at the top?
A: Number one question…here is a picture of the tippy top of the stairs. This pic was taken right after we had the maple floor put down so it was needing touched up…but you can see what was under the carpet. The top of my stairs was a piece of pine much like the treads…it was covered with carpet. I left the carpet there…wrapped around the top of the stair part and it was still stapled to the riser. Hope that makes sense;)

We look at the all the time and still smile. It was the most rewarding project. I encourage you to go for it!!

Here are the other post about the stairs…

Love, Love how your steps turned out. Husband just said that he thought he could do that. (We will see)
This is so timely! We are going to attempt to redo our carpeted stairs with laminate flooring treads and beadboard risers this weekend. Our flooring salesperson said we were crazy and that it would be too slippery. I like the sisal pads in case it is a problem.