This is a sponsored post. The kind folks at True Value have asked me to share a fun back to school project with you. I have been compensated for my time and efforts.
Good Monday friends! Just got in from my morning Stella walk….I feel FAALLLLL in the air and it woke me right up! I am sure it will heat up today….but this morning felt so good. We had a great weekend here…chillin and tidying up the house a bit. Sunday I made some homemade bread….I have never had good luck with bread….but I found the best recipe. I shared an instagram pic yesterday because I was just so proud of my little loaf:) And get this…just 3 ingredients…You will love it! Today’s project is really easy and a nice way to keep yourself a bit more organized:)
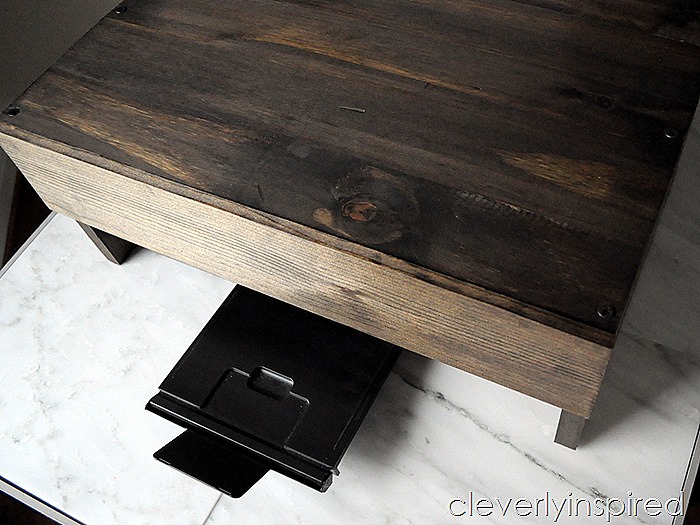
People still use printers right? I’m not the only one right?? They’re kind of an unsightly part of our daily routine. I set out on a small woodworking idea to hide the ugly bulky printer in the corner. I thought it would be nice to add some additional space for paper placement above my printer too. I saw a cool project online where somebody cut a basket to fit over their printer. I couldn’t find a basket that would fit over mine so I decided to make something out of wood. It took me one hour tops and turned out great!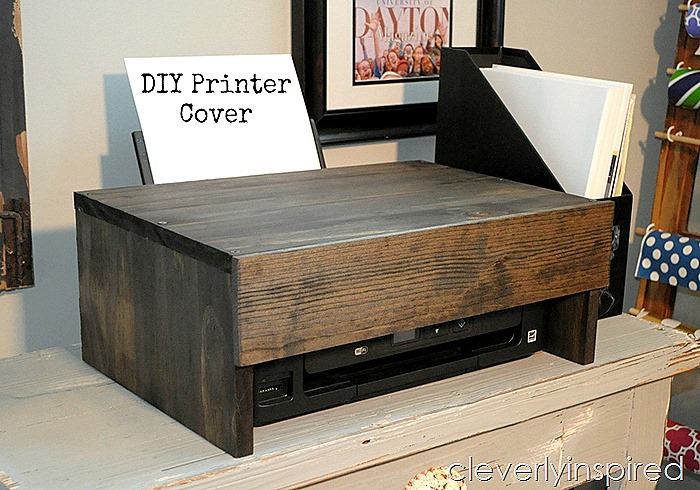
For this month’s True Value Blog Squad project I thought that I would focus on a great back to school item to build for your family office. The thing that I like most about this project is if you haven’t tried any wood working yet this would be a great one to try. 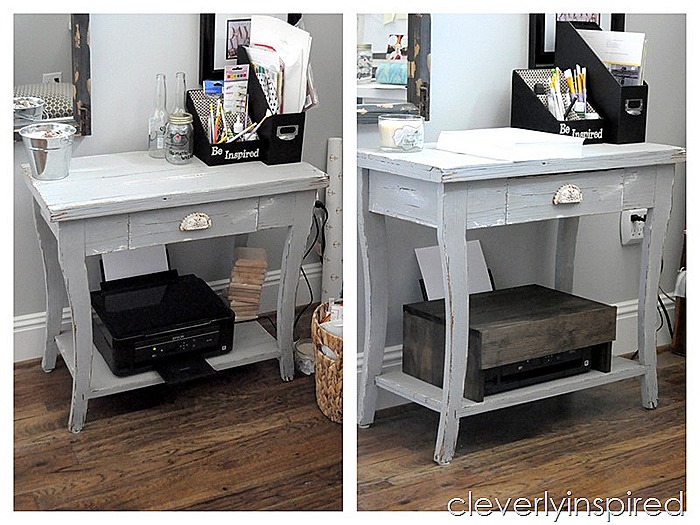 With very simple construction you can design it and finish it out anyway you like. I chose to stain mine because I already had some stain in the shop. I made use of some really inexpensive rustic pine boards. For my printer cover, I needed one 12 X 36 piece. All you’re going to need to do is measure the width, length and height and figure out if you need one or two boards. This piece was only $6.50.
Here is what you will need to make a printer cover:
12 x 36 rustic pine board
1 piece of 1/4¼” inch 4 by x 24” hobby wood for the front
drill
saw (or have your pieces cut at the shop)
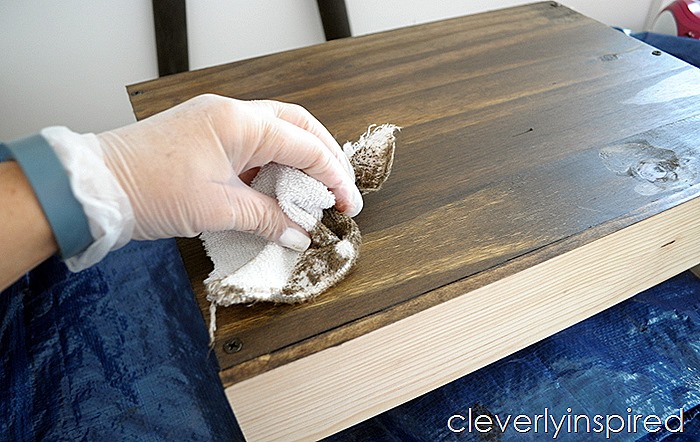
stain or paint (I used Minwax Jacobean)
sand paper
rags and rubber gloves (if staining)
Obviously every printer is unique in size so you’ll just have to measure. Be sure to take into account the three quarter inch board so that it’s not too tight on the sides when you slip it over. It kind of acts like a little slip cover for your printer….A printer cozy if you will :) It makes good use of the top of your printer to store paper and just looks a little bit cleaner in your office area.
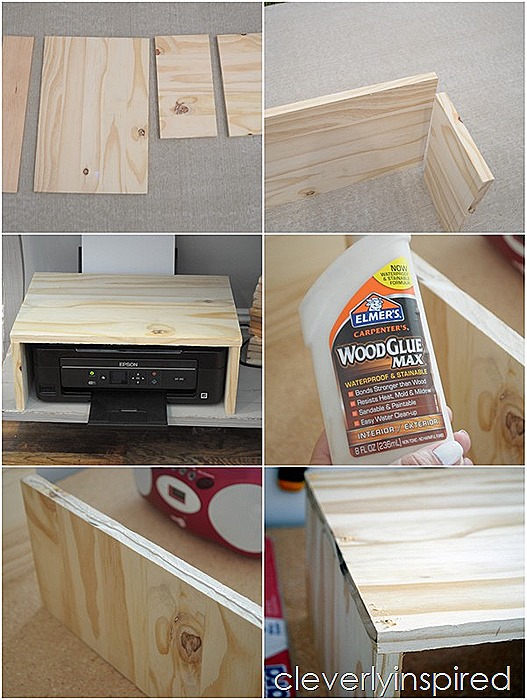
Here is how you put it together:
cut your two leg pieces and your top to size (mine was 17 wide, 6.5 tall, 11.5 deep)
dry fit around your printer to be sure it will fit
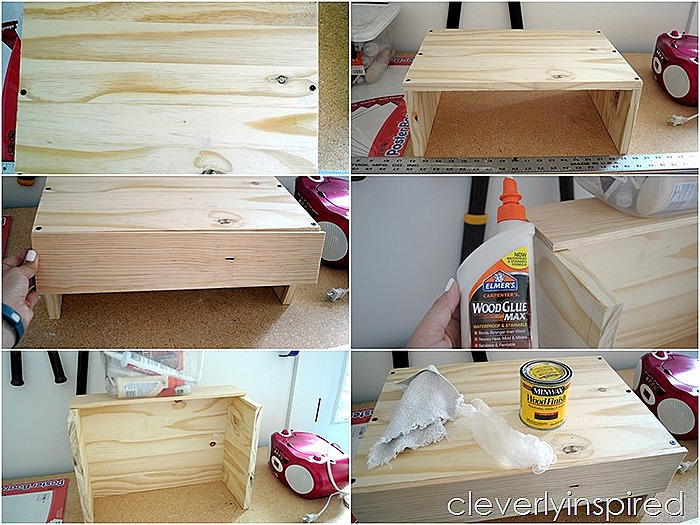
glue top of legs to the top piece let dry a few minutes
using a small drill bit, drill 3 holes into the top going into the legs
screw in the wood screws taking care to stay towards the middle of the legs
wipe any wood glue that seeped out
place your hobby wood on the front with wood glue and place a heavy object on top
let dry and then stain
Remember that if this is your first project to take on by yourself the kind folks at True Value are always willing to give some advice. They are your local go to source for projecting…so be sure to take advantage of them! You can find almost everything for this project there too!
xo
