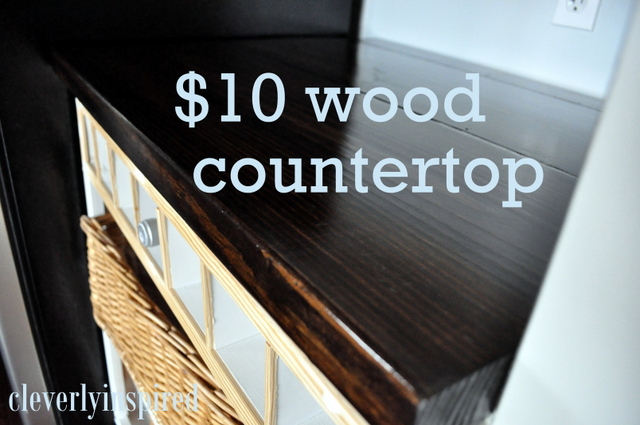
I shared with you a little update on the kitchen pantry last week. We are really loving the space. I wanted to share with you our counter top project. We thought about getting a slab of granite that was throughout the kitchen. But we really wanted something that had a different texture. Wood was a perfect choice…plus it saves about $290 :) Not bad. One thing I will say….we are able to use wood in this area because it will not be a “work” surface. I would do some good research on wood counters before doing this in your entire kitchen. Wood is a porous surface….it would require alot of maintenance if it was constantly getting wet or used a lot. I tend to like things that show a bit of wear….so small imperfections do not bother me. Just something to think about…

I went to lowes and got one 2 by 12 by 8 foot board( please note: this is the only thing we needed to purchase for this counter. We had all the other supplies needed from other projects. (If you need supplies or tools, this Lowe’s promo code might come in handy.) Our white pine board cost us $7.50, and we needed sandpaper. If you don’t have supplies on hand from other projects…you will spend more than $10…still a lot less than most countertops ) Take your time and look for the boards that are perfect. We used white pine which is a bit harder than yellow pine…and you can sometimes find straighter pieces of the white pine. The straighter the board the easier your job will be to create one uniform board. I had the cutting center cut 2 pieces that are 31 inches wide. The total size of our counter is 31 by 25. For the back of the counter we cut a 2 by 4 to 31 inches. So a total of 3 pieces of wood had to be glued together….to form one large counter.
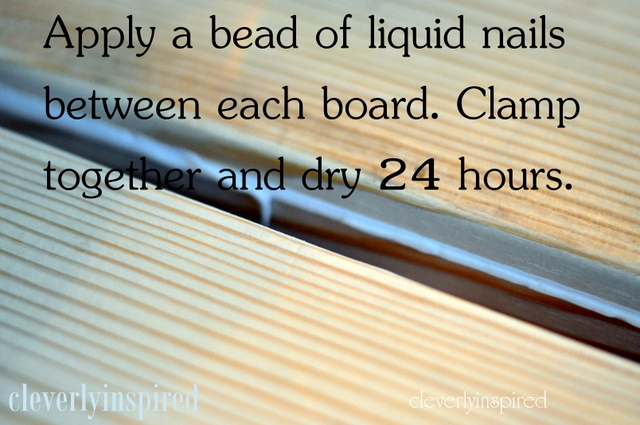
I applyed a bead of liquid nails to all the boards and tied it tight with twine (large clamps would work great here) and we placed a super heavy briefcase on top. Let this dry 24 hours. No exceptions. Don’t touch it or move it. Sorry to be such a bossy pants…:)
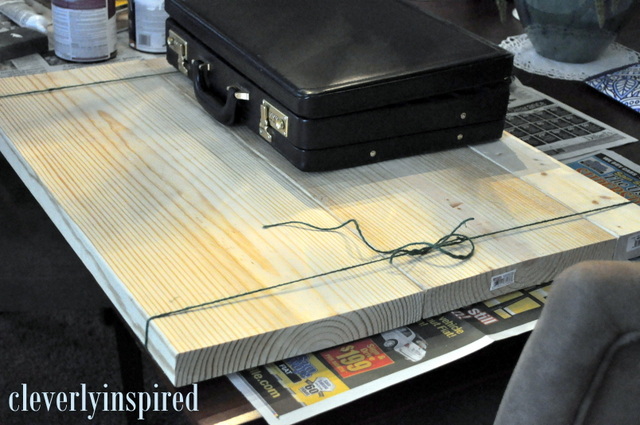
When the glue dries…it will be one fabulous piece of wood :)
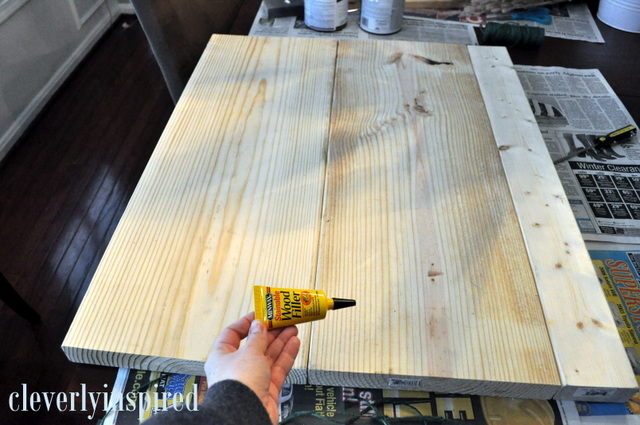
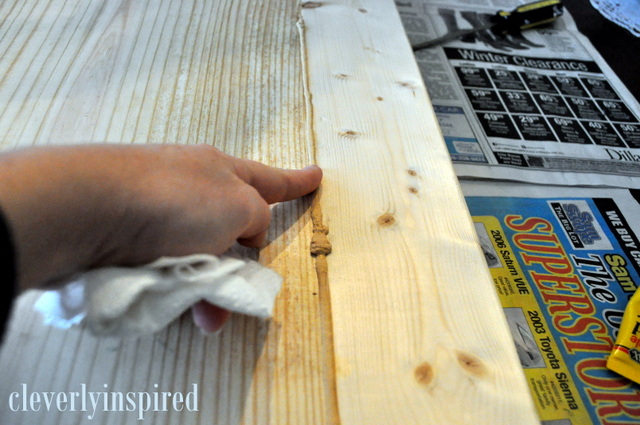
Next you need to fill the seams with a stainable wood filler. Place a bead and wipe with your finger. You can sand down the rest of the filler when it drys. Allow this to dry hard.

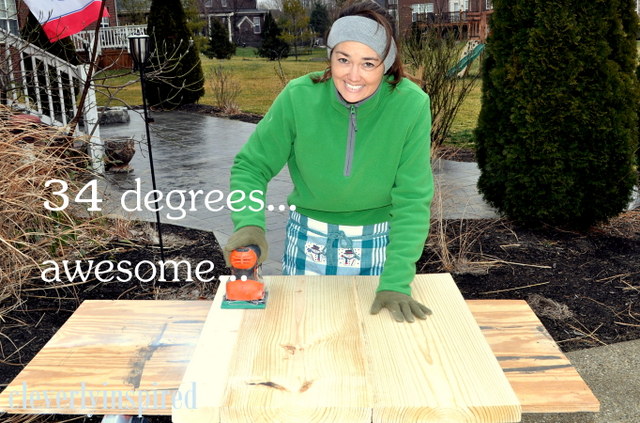
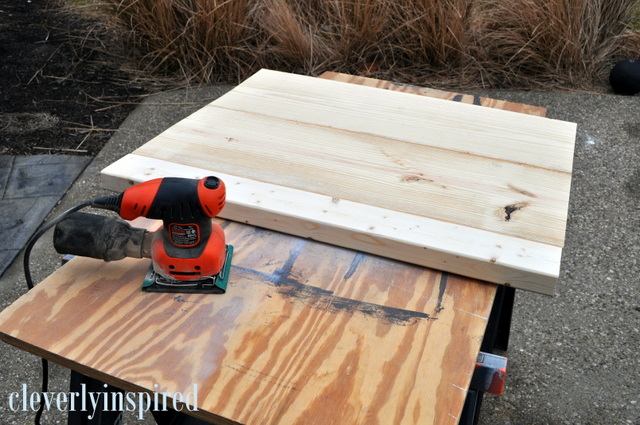
Next….go outside and realize “dang it’s cold, but I want to sand this down anyway…” I sanded the whole top with 80 grit. Then again with 120 grit. Nice and smooth…love :) Be sure to get the edges too.
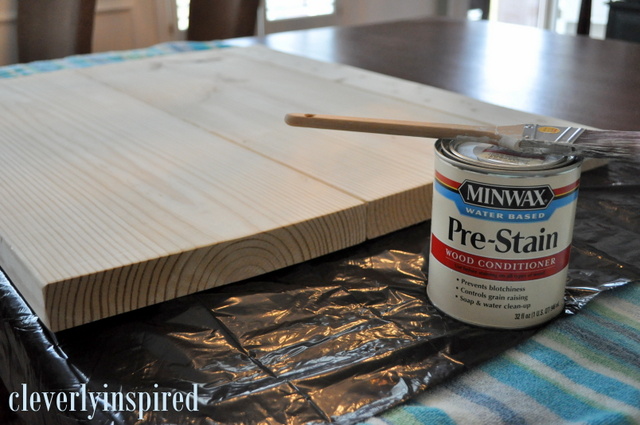
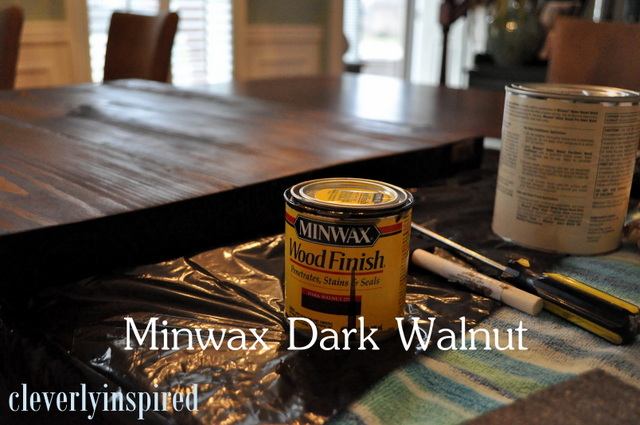
Wipe all the sand off really well. Apply a wood conditioner (otherwise your stain will be all blotchy…blotchy no good!!) Dry 15 minutes.

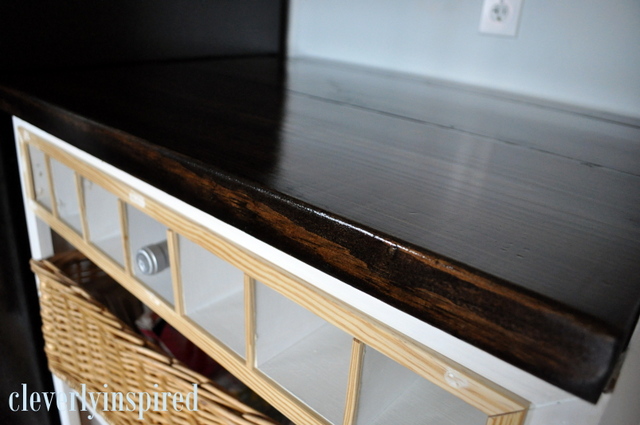
3 coats of stain….sanding gently in between each coat. Then poly, 3 coats. Just like the coffee bar.
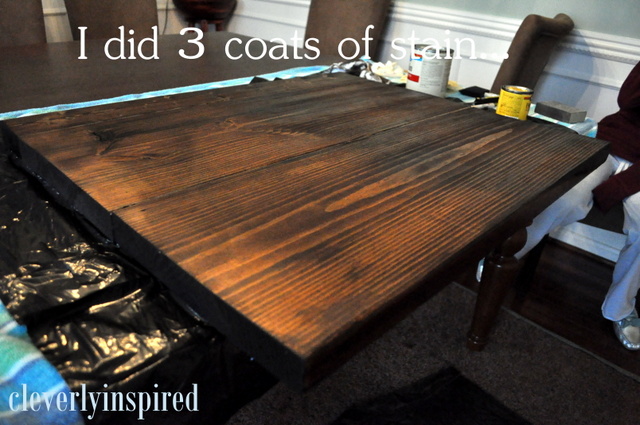


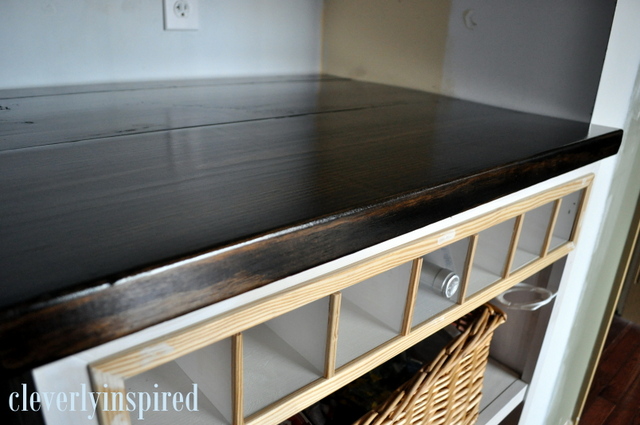
What do you think?!?! Love right…and $10…..LOVE that!!!! It is the perfect color for the kitchen. It will look so nice against the white trim and steel walls :)
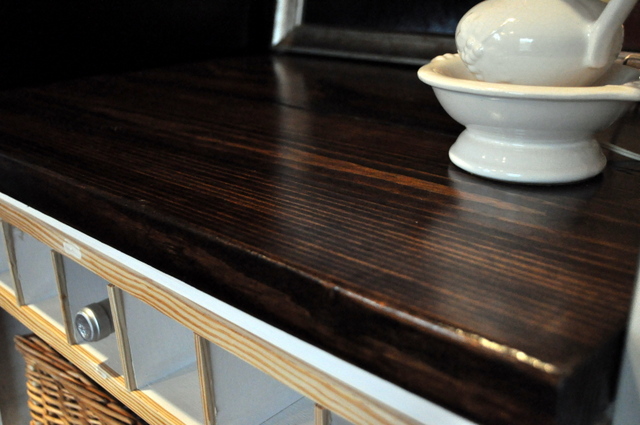
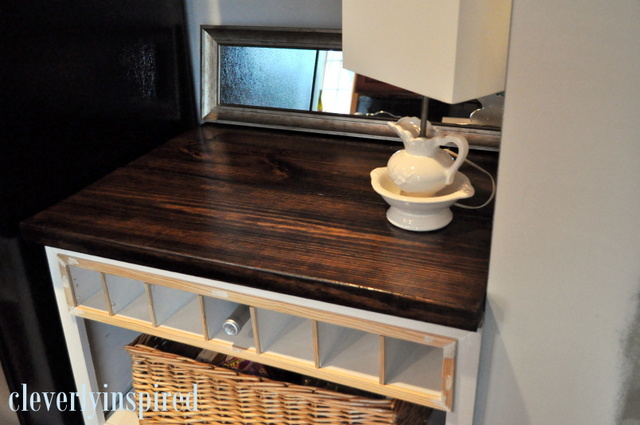
It is coming together so nice :)
What do you think?? Are you going to make a wood countertop now?!?!
* All in all, this is a very affordable countertop project. Again…I want you to know I had most of the materials on hand from my previous coffee bar project. You may need to spend more than $10 on your supplies…just an fyi ;) Thanks for the kind words about this project….I am so thrilled with how it turned out!


It looks wonderful! And you’ve inspired me to maybe try that for my kitchen desktop. I was wondering what finish you used for the poly? I would guess satin or semi gloss? You did a great job!
My poly was clear gloss :) And I did 3 coats….gently sanding in between. Thanks!
Tracie~It looks beautiful! I ran around all weekend looking for a place that sells butcher block cheap. We’re redoing our kitchen island. WOW! It’s expensive. You gave me another option. Thanks. Linda
So happy you like it! Good luck with your island!
It looks amazing. Hugs, Marty
wow looks great!
I love how it looks and especially the dark stain look. Very nice choice to finish your little space! I wish I could do this for my entire kitchen countertops. How practical would that be?
well…I suppose it would depend on how much “hard” use they would get. If you cook a lot and they will be wet often I would think over time this type of wood (pine) would warp. It is a softer wood then say oak, ash or maple. However, if you have a spot like mine…which is not to be used as a main work surface you would be fine. Good luck!!
I love this, you did a great job!
Debbie
Love it!! Might have to reconsider the butcher block we plan to put in our kitchen!
Wow! They look stunning! I love the dark stain. And kudos to you for sanding in the cold! LOL
xo Megan
This looks so good! I am actually starting a similar project for a desk in our kitchen. I am your newest follower. I’d love for you to come check out The Hunted Interior. http://www.thehuntedinterior.blogspot.com
Kristin
thanks! I will be sure to stop by ;)
Hi – super project. However, is this food safe? is there a non-toxic poly that you used? Thanks!
Per the Minwax website…: Anything that is to be used indoors is required to be non-toxic.
I still wouldn’t use this to cut directly on…and if it were in my main “cooking” area…I would always use a cutting board to prep food. Hope that helps!
Tracie
I have been talking about doing this — thanks for the tutorial, it will make our process so much easier! I’m all about the $10 countertops :)
Cheers, Andrea
It never occurred to me to use good ol pine – really creative and they do look beautiful. Just curious – was wondering why you used liquid nails instead if wood glue?
I have had great luck in the past with liquid nails…so I stuck with it ;) I would suppose wood glue would be great too!
WOW! I am SO happy to have found this and wanted you to know that we were just getting ready to do butcher block counter tops, but when they told us it would be 900.00 for our tiny little kitchen, we opted OUT. I showed this to my husband and am hoping with a little begging that he will let me do it! I mostly use my kitchen table to work on anyways….due to the size of the counter space, so I think we will do the entire counter top this way! Thanks SOOOOO much for sharing your idea! Kim
Gorgeous! I’ve been trying to find ideas for a craft table, and this will be perfect!
Looks beautiful! Good work!
-Alisha @ SnugasaBugBaby.com
Ok, may I say, “WONDERFUL” what a great job and what idea !
Fantastic!!! Looking for ideas for a countertop for my retail shop… this is awesome!! Thanks for sharing :)
Gorgeous! Great color! Will look great with all the white.
WOW! This look so expensive and beautiful! I love your stain choice
If you are interested, we’d love to have you share this at our new link party, http://www.waywardgirlscrafts.com/2012/02/wayward-weekend-week-4.html
Love this look!! Thanks so much for sharing your method. Minwax Dark Walnut is my stain of choice, it looks great with everything doesn’t it?!
Looks great! Thanks for sharing!!
[…] $10.00 Wood Countertop @ Cleverly Inspired […]
I might have to do this! Or just make the husband do it! Ok, he probably wont, but I love the idea and I’m pinning it!
this is begging to be pinned!!! and you had me at “$10” :o) amazing amazing amazing!
[…] pine boards from a home improvement store and brought them together to form this inexpensive $10 wood countertop for her […]
that is just genius, and gorgeous, and genius! Love how it looks and so many different places it could be used!
good job – you!
Beautiful! I will be attempting this myself:)
Wow that looks great! We’re actually going this route for our kitchen island. Question though, what did you use to secure it to your table?
Hi Cassie — post coming soon on that. We used liquid nails to secure it to the cabinet. We also countersunk wood screw in one screw in the back corner. Sometimes it is hard to find perfect flat pine. It was mostly flat but needed a screw to level it in the back.
Love your countertop! You did a fabulous job!
I have been looking for reclaimed wood to do something similar…but couldn’t find anything big enough. Your solution of gluing them together is genius!!! It looks beautiful!
This is phenomenal! I am fully obsessed with DIY block wood surfaces for a variety of projects (a desk, bedside tables, and a dresser I’m putting in my kitchen). Just curious, what were the steps you took to attach it to the little cart it’s sitting on? Putting a top like this one on my kitchen dresser is my next project :)
Hi there! Thanks!! I will be doing a post on Friday about installation. We used liquid nails and a screw the the very back of the counter. :)
The three products are more than $10: Pre-Stain, Stain and Polyacrylic…then you had the wood and sandpaper to buy too…well You may have the sandpaper on hand at home…that is pretty common.
Other than that the counter is very nice.
Are you concerned about the boards moving apart? Normally with changes in temperature and humidity the boards will expand and contract. Is the liquid nails enough to hold it all together?
I am not really concerned about that. This small counter is on an inside wall and it is secured with liquid nails and screws. I will be doing a post on the installation on Friday. :)
I love this idea and it inspired a complete bathroom reno! We got new tiles, new toilet, the works! Our powder room is going to look amazing with this as a new vanity counter!
However, I have to ask… how did you do this for $10? My lumber alone cost 11.99 for the 2x10x12 and 4.08 for the 2x6x8. The the varnish cost $34.97 (bar top & table finish), brushes and tray I was able to get from the dollar store for $1.25. I used stain I already had… but that would be an added $10 if you had to purchase it… so my grand total (including canadian 13% tax) is $59.09! Still an amazing price for a new vanity counter top but definately not $10…
she stated like 6 times in her post that it was $10 for what she had to buy and if you didn’t have the items at home she did, it would cost more..
[…] $10 Wood Countertop in her current kitchen update […]
OMG!!!! OMG!!! OMG!!! That’s BEAUTIFUL!!!! It looks soooo rich! I love it :)
Would you PLEASE link this up on my blog?
http://thediydreamer.blogspot.com/2012/02/from-dream-to-reality-linky-party-3.html
This counter top is gorgeous! Love it!
[…] took out the pantry and added in some open shelves and a base cabinet…along with our custom wood countertop. So open and easy to use…we are really loving the extra countertop […]
Just had to stop over and tell you how much I liked your countertops! What an awesome idea. I just pinned it!
blessings,
karianne
so cleverly AWESOME! if i may make a suggestion. you could use resin to seal it, about 3-4 coats. this will make it water and heat resistant and will reduce the damage. the only downside is that it stinks and takes about a week or two to dry completely. it looks great just the way it is though, love it!
I love how this looks!! It’s such a cheap way to customize the kitchen! I used the same type of wood to make a custom desktop in my craft room – it’s so cheap for so much space! I love how yours looks!
I adore your counter top! Thank you SO much for the great inspiration and for linking up at crafty scrappy happy!
Jaime
[…] DIY Wood Countertops by Cleverly Inspired […]
This is gorgeous! I can’t believe the price, they look so expensive.I love the rich wood against the white. Wanted to let you know that I featured you today! http://designdininganddiapers.com/2012/02/features-from-link-up
Thanks so much!
Oh, very nice! My husband did nearly the same thing for my kitchen counters about a 18 months and I love them! After staining ours, he coated it with 3 coats of Waterlox. We chose that route because of the expense associated with new countertops. I love them so much now that I think I’d do it again! :) Yours looks nice!
Thanks so much ;)
[…] you know…we are in the mist of our kitchen update. I have shown you the countertop…and the removal of the pantry so far. Here is what we decided to replace the pantry with….and […]
Wow, you are awe-inspiring. Being from the deep south, I avoid going outside under about 50 degrees and NO WAY would I sand something at 34.. I’m new here and … here to stay! you go gurl!
It’s awesome! Question, what grit sand paper do you use in between the coats of stain and varnish? The 120?
Was wondering what you thought about using this idea to reinvent dining room table? The set is white looks like it could be wood but I dont think so. It has a crackled pattern on all the pieces I just wanted to warm it up a bit. Any suggetions.
thx, Janai
Brilliant. Simple. Lovely. {And cheap–I think I’m in love.}
I am in love. Thank you for posting this tutorial. I’m in need of some good counters, but not willing to spend the money for store bought ones. You’ve just eliminated a lot of my decorating-on-a-budget stress!
[…] DIY Wood Countertops from Cleverly Inspired […]
Hi,
Now Irish I didn’t pay t my countertops, my hubby made temporary countertops until we can get granite. How do you remove paint from the wood and do you sand after the stain dries? My new cabinets are a dark espresso.
I LOVE this!! The color is gorgeous. I shared this on my blog today: http://www.vixenmade.com/2012/04/amazing-home-decor-makeovers.html
Thanks so much!!
How did you attach your countertop? Love it!!
Never mind! Saw your earlier posts!
I love this!! Completely adore the dark stain you’ve opted for too … Definitely pinning this to my “want to do” list!
Cool. I have “temporary ” wood counter that I can stain like yours. Since I’ve got a board, all I need is stain and sealant.
Wow! I tore out the old laminate countertops a couple of years ago and tiled my entire kitchen counters. I am in the process of replacing my hardwood floors in the kitchen and the cabinets will have to be removed, so I have been pricing butcher block countertops. Too expensive so decided against it until I came across this. How awesome! Now when they replace my kitchen floor and cabinets I am going to do exactly as you have done. Thank you so much for the tips and how to save me money, but looks expensive at the same time. Great job!
Thank you. Your counters look awesome. I am in the middle of a decorating project with kitchen and family room. Wanted to take out the old laminate counter…choose not to pay the money for granite (does not really move me like most people). Prices marble and butcher block…. OMG. I wen to Lowes saw the wood and had a thought…came home and googled and there you were. New counters here I come. Thank you for the post.
That is beautiful. I have a suggestion. If you did want this where you had a lot of water, you could use a Marine (used for boats) polyurethane (non yellowing) to finish. Then water shouldn’t be a problem.
This is great! I never thought that there could be a $10 countertop, awesome! We want to change our old countertop, I guess I’d better show this to my husband!
GLumber.com
Will be doing this project for our laundry area. We are building our front loaders into a counter and shelves. This was exactly what we were looking for!
I love your countertops and am planning to do something very similar. I wasn’t thinking of doing the stainable wood filler until I saw your tutorial, I was going to do it more like John & Sherry at YHL. However, I like the wood filler idea. How has it held up? I’m afraid it would crack as it aged.
Thanks!
Julie
I thought about this wasn’t sure how it would look now I know it’s possible and it’s the way to go! Thanks
I think I might just try this on my island!
I love this idea. I am starting my kitchen redo in about 3 weeks. Does the 3 coats of poly make this completely waterproof? Kinda worried to do wood countertops if bacteria and water can seep in.
Finally a solution to what I was looking for :)
looks great! marine wax (used for boats) can be used to waterproof the wood.
Thanks for the great tutorial! I’ve been looking for an alternative since I found out IKEA has discontinued the wooden counters we wanted to use for our kitchen this coming year and I’m trying to convince my husband to go the DIY route.
If I were to do this in a kitchen with moderate use- what kind of wood should we use? An oak cut? I’m not sure which wood is soft- pine I believe. Thank you so much- beautiful. Getting ready to redo counters and would LOVE wood
As hard of a wood as possible. I would look for oak or walnut. This counter is pine—but it doesn’t get a whole bunch of use. Also, finishing with a Marine varnish is a great idea ;)
Love this idea. So going to try it. I love the Dark stain with the white base
Very beautiful. Also wanted to suggest using a Kreg Jig to attach the pieces together. It would be way more stable than Liquid Nails and would take about 2 minutes vs. 24 hours.
Your countertop is beautiful! Thank you, for sharing you creation.
[…] DIY Wood Countertop […]
I love the wood counter top, I’m looking for counter top for my outdoor kitchen. Do you think I can use wood counter top for my outdoor kithchen?
Hi there! I would look into coating it with a “marine grade” polyurethane. This should do a good job of protecting it from the elements. An outdoor kitchen sounds fabulous to me! :)