Hey hey….Derby week here in the Bluegrass!! Busy week for sure…I am going to share with you a yummy Derby brunch recipe this week that features a Kentucky proud product (starts with a B and ends with OURBON:) Editing those pics now…. Hope you are having a great start to the week…
cv") I told you last week that I am working on putting together a few decorations for my nephew’s high school graduation party graduation. It has been fun dreaming up and creating some unique features for his celebration. So is was perfect timing when my friends at Martha Stewart sent me a fun package and invited me to create a craft to use for a party this season.
I told you last week that I am working on putting together a few decorations for my nephew’s high school graduation party graduation. It has been fun dreaming up and creating some unique features for his celebration. So is was perfect timing when my friends at Martha Stewart sent me a fun package and invited me to create a craft to use for a party this season.
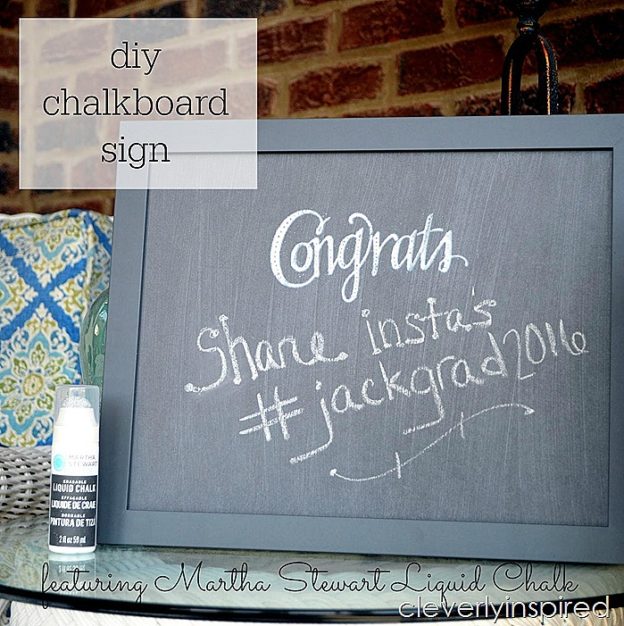
It was full of some really great new products that can all be found at your local craft store. My fav in the box is this liquid chalk product.I don’t think it is all that new…but it’s new to me! If you dislike your handwriting as much as I do then this will be your new best friend. So cool that you can reuse your chalkboard after you stencil on it with this chalk paint …it dries and will come off with water!
")
You could use it for so many different things but I thought it would be fun to make a sign for my nephew’s graduation party. The thought it would be fun to share a specific hashtag on Instagram at the party. Lots of brides and grooms are doing this at their weddings now too. Creating their own hashtag for others to follow along and share photos of the event. There’s so many different occasions that you could use this sign but I thought that this since I am in full graduation mode for my nephew would be a perfect opportunity to use it.
")
Here is what you will need to create your reusable chalkboard sign…
- 11×14 frame
- Martha Stewart Chalkboard paint
- sponge brush
- Martha Stewart white liquid chalk
- stencils of choice for your project

- Paint the mdf board that came with the frame with the chalkboard paint and let dry.
- cut out the stencil you would like to use and stick it on the board
- pounce the liquid chalk on the stencil and remove
- it dries quick…so you are ready to complete your sign and use:)
The stencil pack that came in my set had several words that would fit in with your party. “Menu”, “celebrate”, “Love”….etc….It would be fun to create a Menu board for your next get together….possibilities are endless:)
")
Maybelline sent along some Superstay 24 Longwear Lip Color—perfect for all those grad pics that you will be taking this spring:) Camera ready!

All day color…no need for reapplying. And if you are searching for some new recipes to try out, Wisconsin cheese’s grilled cheese website may be just the inspiration you need to get the party appetizers rolling. :)They would love for you to enter for the chance to win $15K. All you have to to do is enter your fabulous Grilled Cheese creation….see the site for more details…. And be sure to check your grocers snack section for a low cal sweet treat by Weight Watchers….they have a yummy chocolate caramel treat that is just 2 points:)
Thanks for such a fun surprise box Martha:)
This post has been sponsored by Martha Stewart Omnimedia. All ideas, thoughts, photos and errors are 100% mine. I have been compensated for my time.

[…] other bloggers. I shared with you a few weeks back the Hat Card Box that I made. I also shared the chalkboard and I wanted to give you an idea of what else was going to go on the tables and a few other unique […]