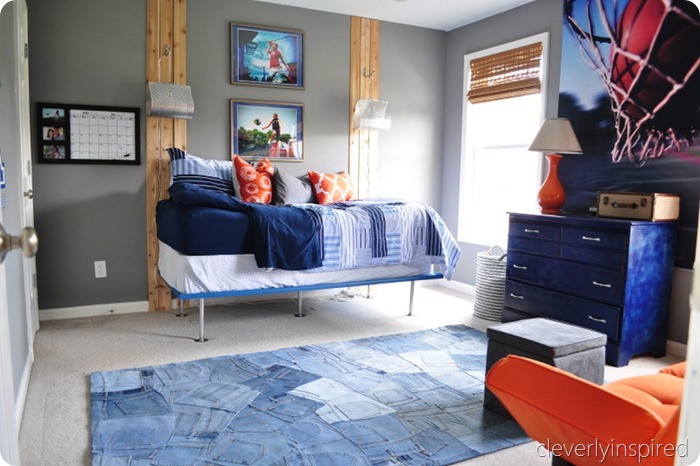
I originally felt a little silly getting rid of such a nice sleigh bed in my son’s old bedroom. But it was taking up a lot of space and it wasn’t what he wanted for his room…and I wanted this space to reflect him. I ended up researching some beds I could make. I wanted it to look industrial, not take up much room, and be affordable to put together. I scanned the web and found this one at Restoration Hardware. I love the look of it….but I didn’t want to shell out $700…and I didn’t want the head and footboards. Here is how I made my own DIY pipe bed…
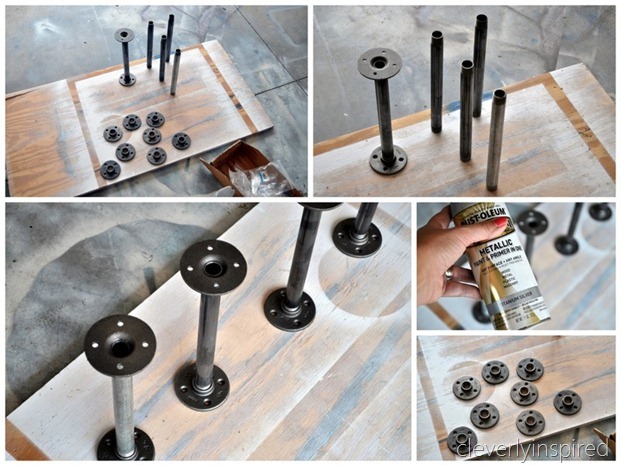
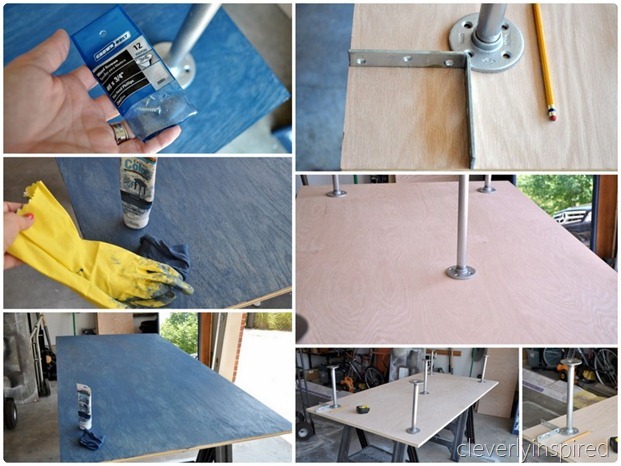
In the plumbing department…they have loads of galvanize pipe. The pipe I bought was called black pipe. I got 5 pieces that were 12 inches long. The flanges for these are sold in the same aisle. Look for 3/4 inch floor flange (the pipe is 3/4 inch wide). The folks in that aisle can help you if you take a picture of this post with you. You will also need some wood screws, purebond plywood (there are many reasons to go with Purebond…but I really like the fact that it is formaldehyde free…in a bedroom this matters a bunch.)..paints of choice are needed too.
First I cleaned the pipe with alcohol. I then connected the parts and sprayed with 2 coats of metallic spray paint. I wanted them to have a cleaner finish. Feel free to leave them as is …if you like the black. I stained the bottom my minwax express color in Indigo. Using a corner bracket for measuring….I attached the pipe parts to the bottom of the plywood. One in the center and one on each corner.
We trimmed out the edges with 1” trim and painted it the same color as the pin board on the wall. (I believe it is blueberry from BenMoore)
That’s it! Super easy project…total spent was about $90 (I don’t have exact amount….sorry!)
Here is the room reveal in case you missed…
I need to say…thanks…thanks to all of you who send me sweet notes, emails and words that are inspiring to me. It makes the mean and nasty comments that I receive much easier to laugh at. I appreciate you all! I wish you a wonderful weekend :)
Sharing at home stories a to z


This is a great idea! I saw your light tutorial a few weeks back for this room too, and I love how industrial everything is. Nice work, and thanks for the inspiration for my kids’ room.
Love the bed! What a great idea. I love projects like this.
Love, I’m going to try this for my son’s room!
Oh my goodness, that came out amazing, just going to check out the rest of the room, I’m loving the mat on the floor!
Have you told us about the denim looking rug on the floor?
This is AWESOME!!! Wow what a fun bed to sleep in and the rest of the room is amazing too. Great job.
http://www.itsybitsypaperblog.com
What a great idea, the bed is so well supported…be careful vacuuming under the bed…the extra super supports…love this idea! thanks!
This tutorial is awesome Tracie! Thanks for linking up to my Pity Party. I’ll be featuring you tomorrow. xo
I loveee this ! How big was the plywood ?
Oh I forgot to measure…. About 3 inches wider than the mattress:)
Wow, marvelous blog layout! How long have
you been blogging for? you made blogging look easy.
The overall look of your website is wonderful, let alone the content!
Thinking of doing this for my stepson’s bedroom this weekend. I have a few questions… how does it withstand the rowdiness of a teenage boy? Have you had any problems with support? Splintering around the edges of the board?
Now that he’s had some time using the bed is there anything you would differently?
Thanks!
Great job on the bed, but I have to ask: did you make the blue jean rug?