I did not just eat a Reese’s for breakfast….no that isn’t chocolate on my face…carry on, carry on….
Hope you have a lovely Halloween night! We had a fabulous neighborhood potluck! So many kids!! And I love all the costumes and excitement. It is times like these that I feel really blessed to live around so many dear friends and families! Onwards…..
I had been wanting to add one last piece of art in Patti’s office. There needed to be something over the daybed. It was a wide open wall…and I wanted to do something unique. I was completely inspired by this posting on imperfectly polished . She uses a old barn door as wall art…LOVE! With no available old barn door…I set out to make my own version. Here goes….
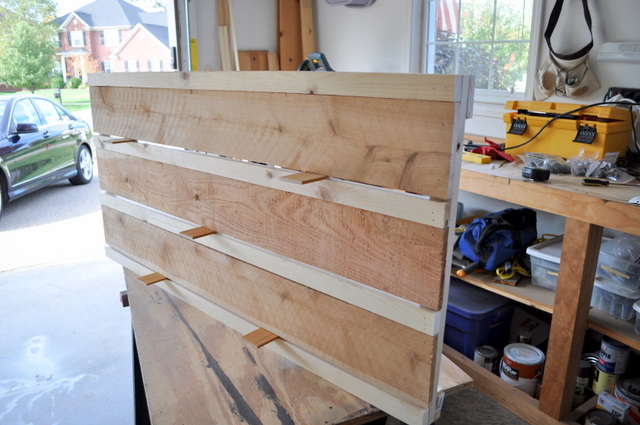
I bought 3 cedar fence pieces ($1.95 each) along with 4 pieces of 1 X 2 (they were 6 feet long). I also used 2 pieces of 1 by 3 for the top and bottom of the frame.
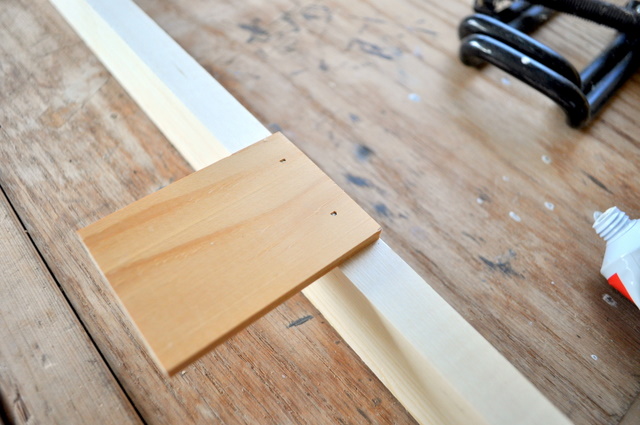
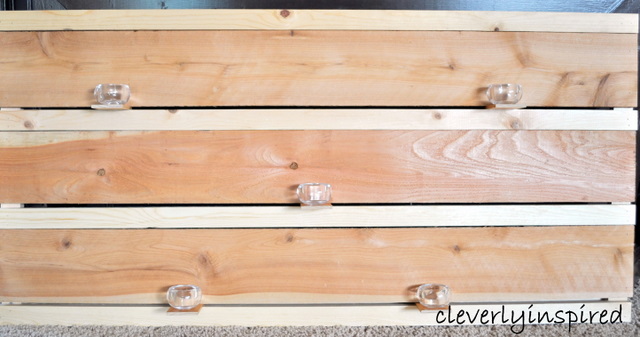
I laid out the design that I wanted prior to adhering anything together. I wanted to be the measurement of the frame would be hidden behind the wood in the front. My piece completed measured 48 by 27. I used 5 small pieces of thin crafting wood on some of the 1 X 2 to hold candles.
I figured out where to place them and marked with a pencil while it was all layed out together.
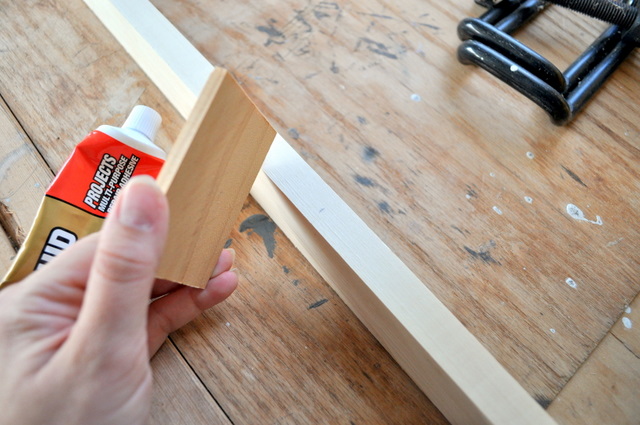
I used a nail gun to place the small pieces of wood on the 1 by 2.
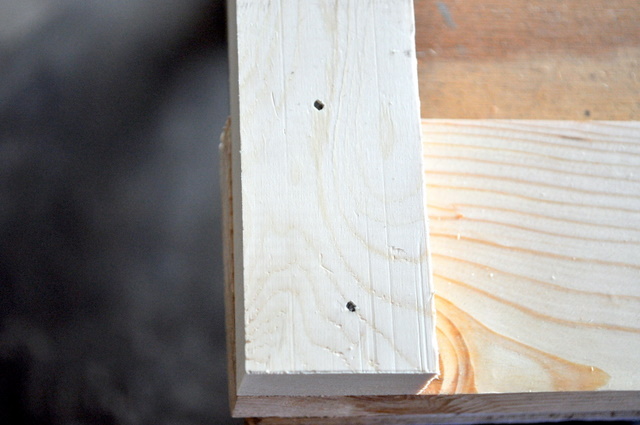
To construct the frame…I laid out the top and bottom (1 by 3) and placed the two 1 by 2’s on the top.
Place some liquid nails on the corners, then the 1 by 2, then screw also to have a nice secure frame. Be sure you are on the level and square :)
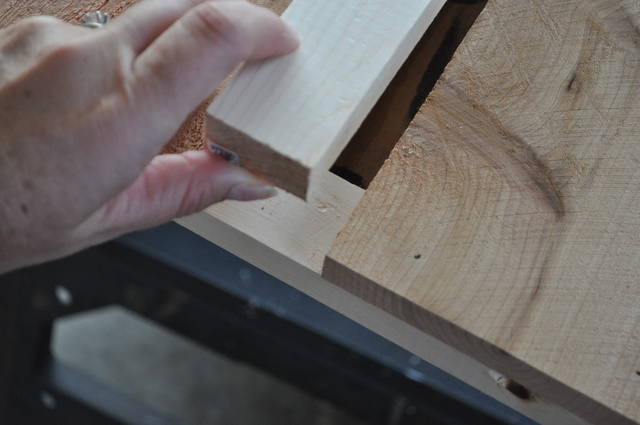
Then you basically start at the bottom with your first piece of 1 by 2 with the craft wood pieces already attached…you attach that to your frame. Then place a cedar piece, then another 1 by 2, and so on. This art is supposed to be rustic and imperfect…I cut all my pieces to length with my miter saw. If you don’t want to use the saw then have the home store cut them to your length. No biggy!
I attached all my pieces with liquid nails first and followed that with a few nail gun. KaPow, KaPow…nailguns=fun :)
This piece would look cool stained or painted too…if that is how you want to roll. I was going for the natural-woodsy feel :)
On the back I used some heavy duty picture hangers. Nailed one on each end.
A very unique piece for just a bit of money and time.
It looks great in Patti’s space!!
Here is the inspiration piece…
I am participating in the Pinterest Challenge ..sharing over at
Young House LoveSharing at The idea room
Whipperberry
Tattertots and Jello


Wow! It looks fantastic! You did a great job:)
I was thinking on a bit larger scale, weather treating and using outside as a privacy fence, what do you think? Really like the idea, pretty.
Clever! and really cute. nice job.
Very cool! Come link up to my new link party, the Head to Head Showdown at http://www.icantstopcrafting.blogspot.com!