
I make my kids an ornament every year. When I look at my parents tree every year…I always find the homemade ones first. I love the one of me in First grade—no teeth–and misspelled words in all ! These are the traditions and “artifacts” of a family—where we have been and where we came from. And every year—when we get all our Christmas ornaments out to decorate our tree, it is those homemade ornaments that we laugh at every year—the bring an instant smile.
This year—I did one of these little Time Capsule ornaments.


All you need is
-
Modge Podge
-
Plastic clear ornament
-
Scrapbook paper
-
sponge brush
-
picture printed on computer paper
-
Small piece of ribbon (I used my son’s favorite color)

I cut my scrapbook paper so that I could run it through my printer.
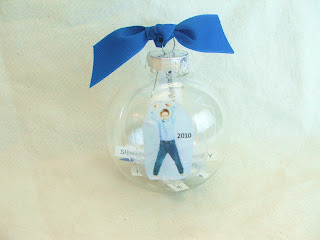
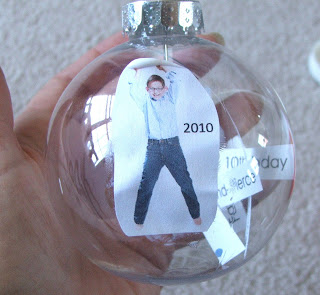
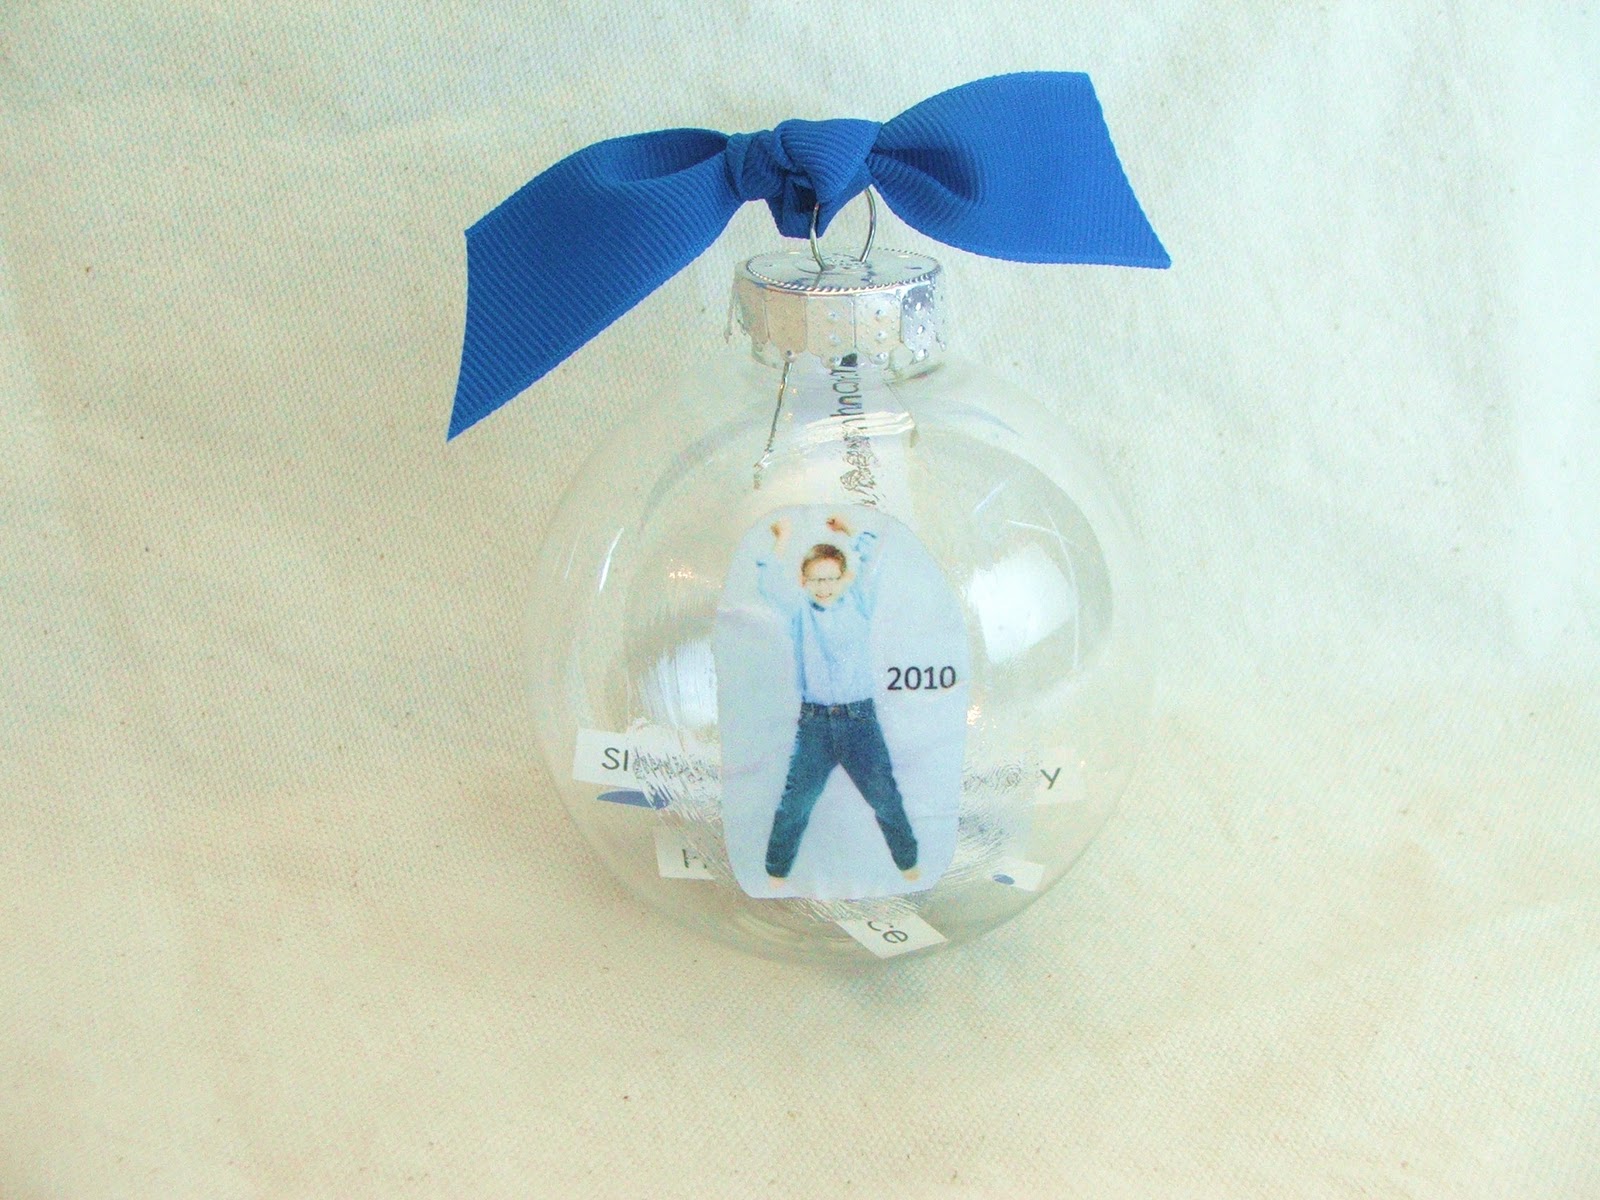
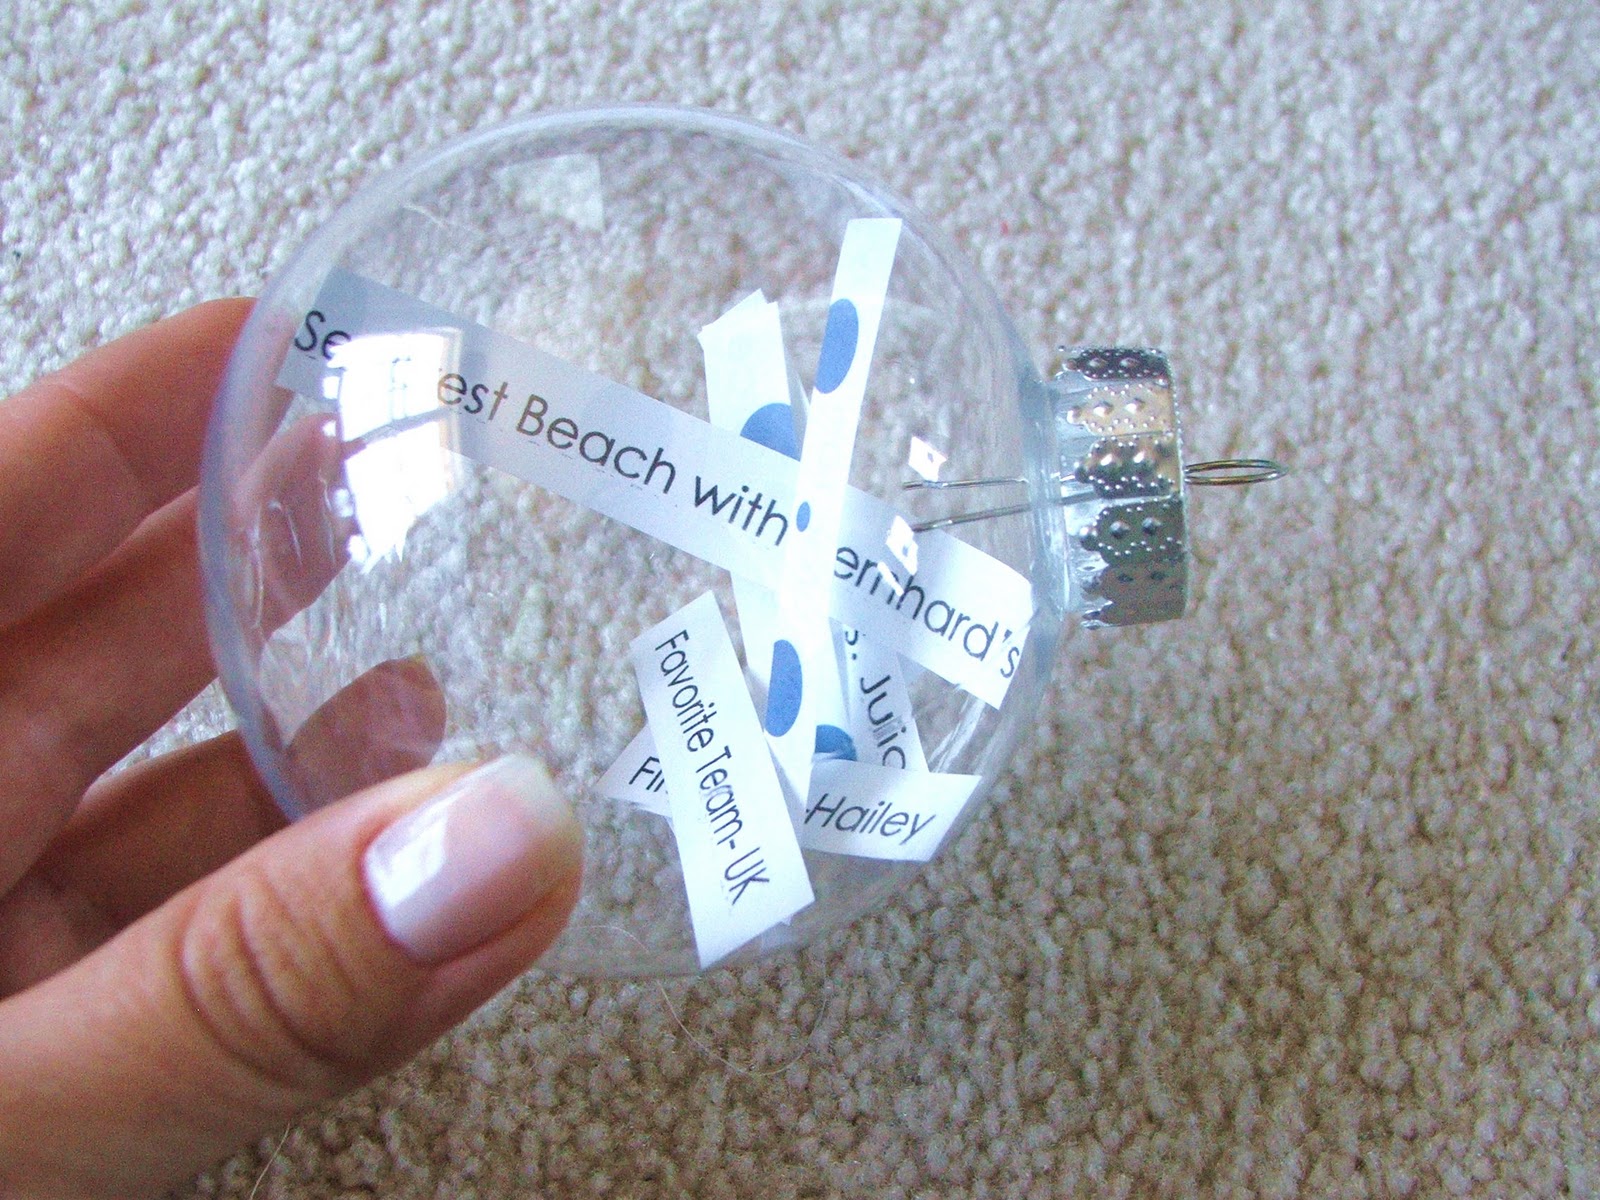
I came up with some things that happened this past year for my son. Example: his teacher, his best friend, favorite sports team, vacations we took, what he did for his birthday, etc….
I printed them on the scrap paper (on the white side) and cut them into strips. (I used Century Gothic font size 16) You don’t want the strip to be too long—or it won’t fit in the ornament.
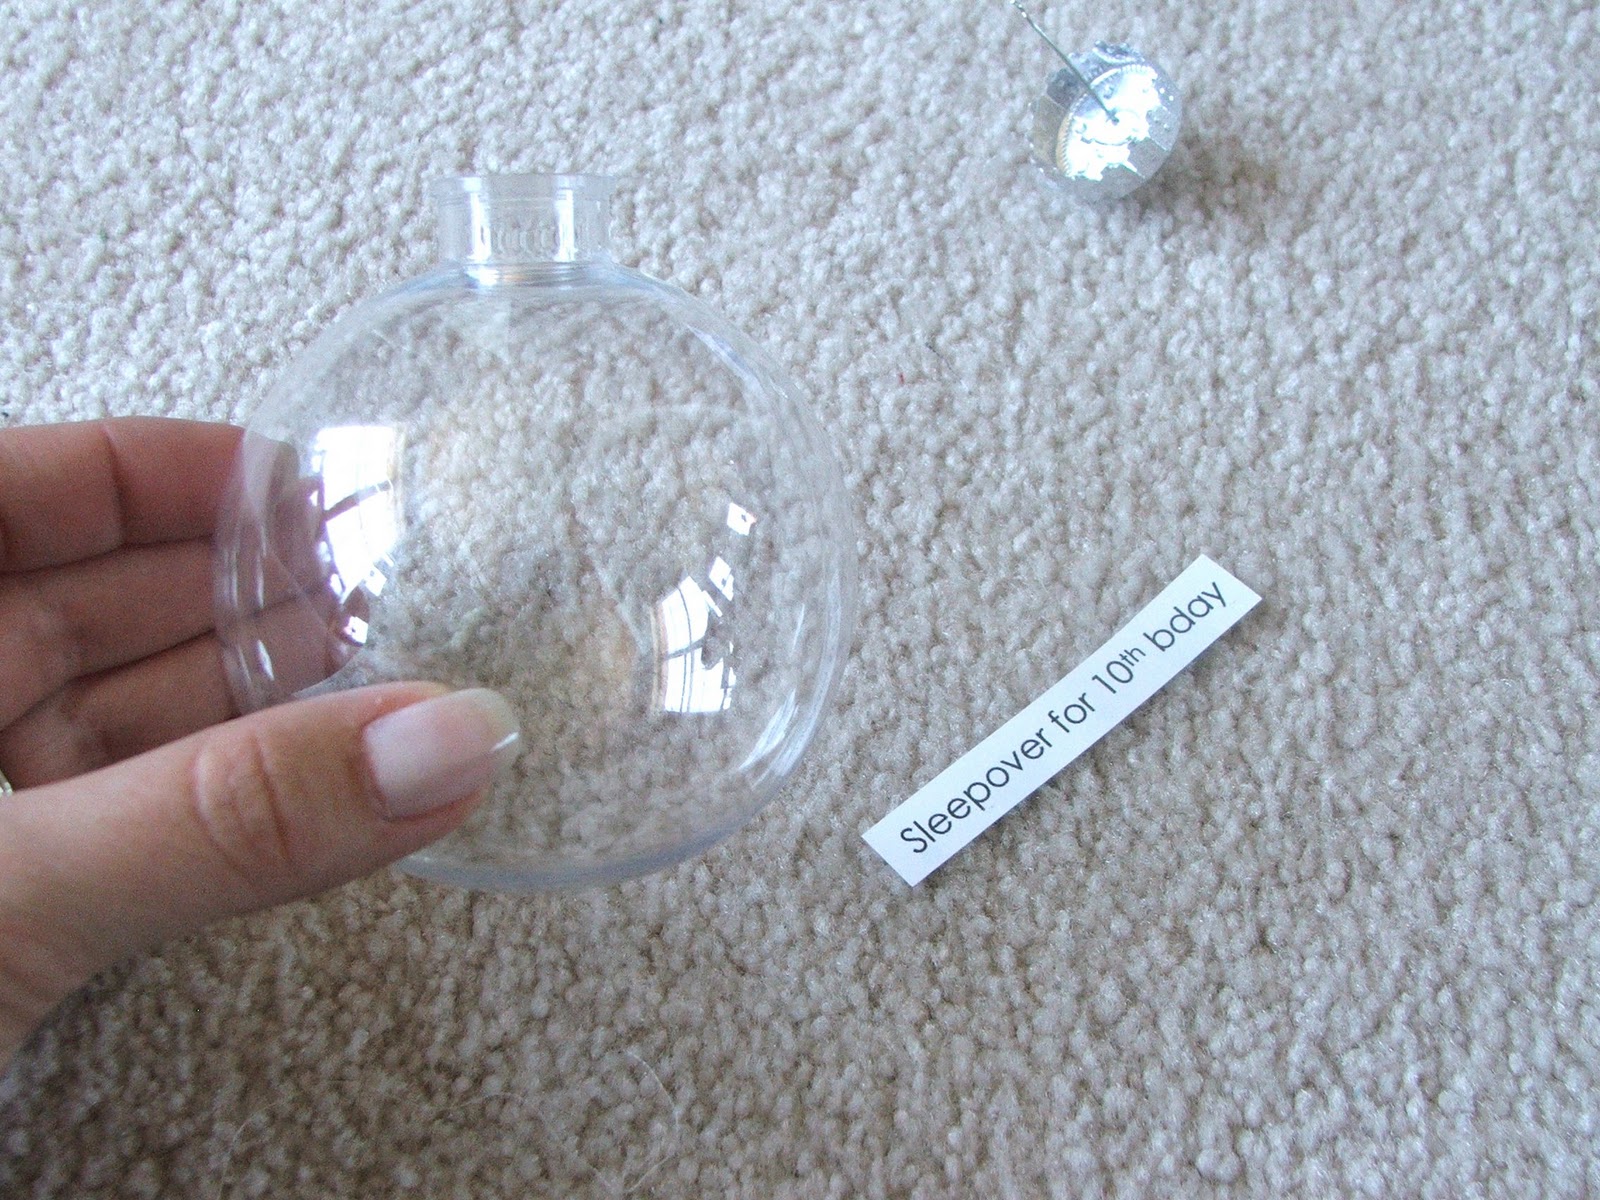

Gently take off the top of the ornament by squeezing the metal prongs. Cut up the strips of paper and slip them into the ornament.
Replace the top of the ornament.

Cut out your picture and use modge podge on the back. Adhere it to the ornament.
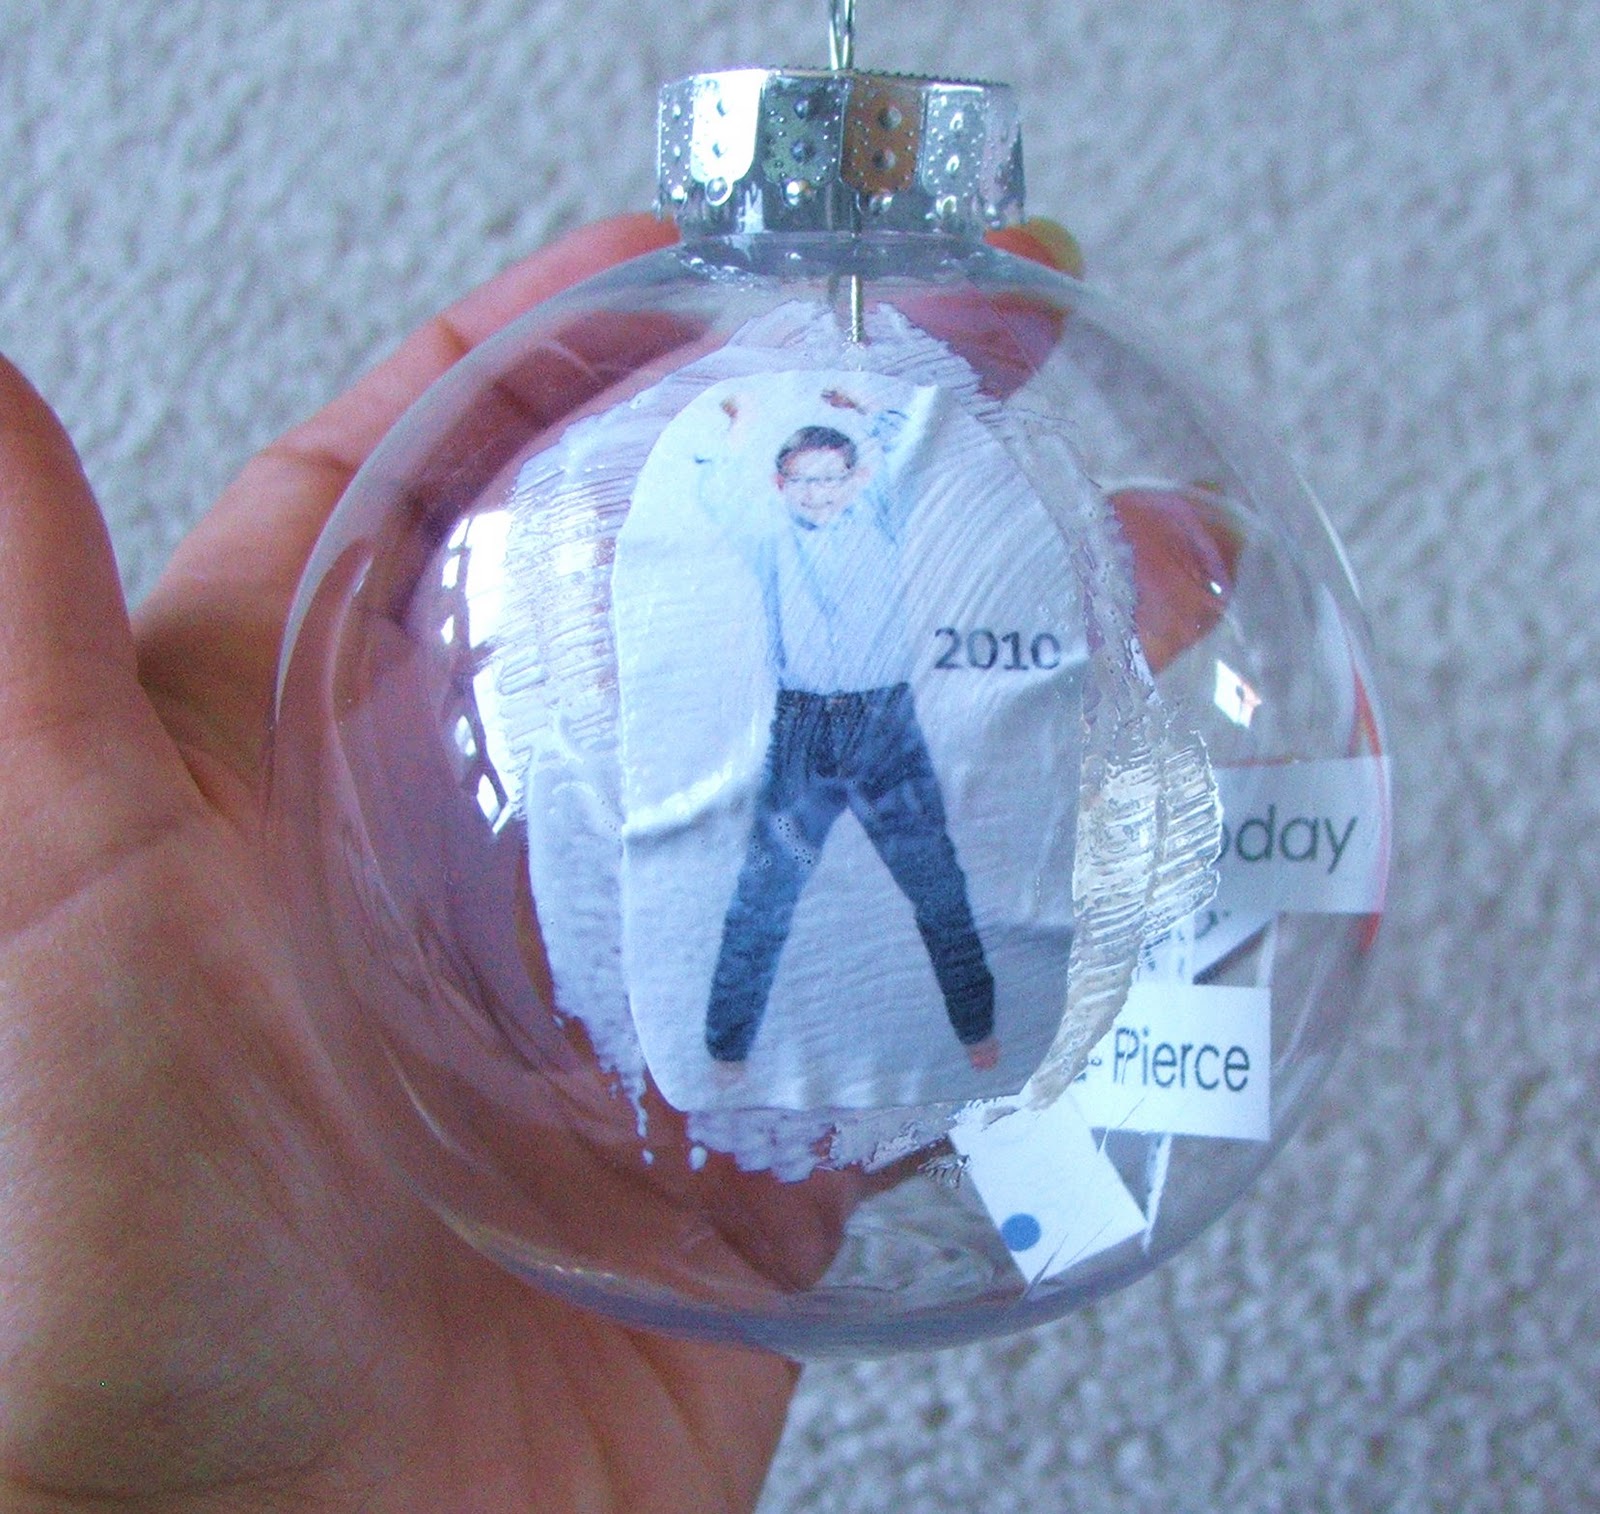
Brush a layer of Modge Podge on the top of the picture. Smooth out picture with your fingers. After that drys–brush on another coat and let dry. It’s ok if it is a little bubbly–it’s homemade!! Love that!
Time for me to make Emily’s!
How fun to look back on these;)
Sharing today ….

Be Inspired to be Clever ;)
What a cute idea!! We love making ornies each year too. So much fun and sooo many memories. Thank you for sharing this great idea and tut.
Hugs,
Regi
So Happy I found you on Trendy Treehouse.
Cute idea. I think I'll try that.
What a cute idea!!
I shared it on my Tatertots facebook page :)
xox
Jen
great idea!
{Rebekah}
I love putting the favorite things inside. What a great way to remember them!
Adorable~! I am doing a time capsule ornament too. a lot different then this one but I love the idea.
FABULOUS idea! Love it!!
I absolutely LOVE this idea! I want to make them for my girls this year! Thanks for the idea!!
Luv you,
Melis
This is so clever! I love this as a way to capture the special memories for the past year. I might have to try this one! Thanks for linking up at WhisperWood Cottage!
Amy
I love this idea… and my kids would love helping with it! Thank you for sharing something so simple & fun!
You are so clever. Love this idea. I'm your newest follower.
This is adorable! So many possibilites! I would love for you to link up to my party too! http://polkadotsandpizza.blogspot.com/
How cute! I love how simple it is, but it captures so much, and it will be so much fun to pull those out year after year!
I love this! We did the same in my family growing up, but this one is so much more classy looking! Love it! I hope you don't mind if I feature you today on my blog! Thanks for this inspiration!
Have a great day!
Tasha!
http://www.dotdotdotthis.blogspot.com
p.s. I am your newest follower!
Adorable! I'm going to do this for sure. Just wish you'd posted 15 years ago…when my first was a baby. Spectacular idea! Found you through Girl Creative…and girl, you are!
Tracie this is such a cute idea! Love it! Thanks so much for linking to the Sunday Showcase – I greatly appreciate it. I have featured this today – stop by and grab a featured button if you like. Hope you are enjoying your week ~ Stephanie Lynn
This is really cute! I am going to do this. Visiting from Today's Creative Blog!
I really like this idea. It is something that I always wanted to do for my kids while they were growing up. Maybe I can make some ornaments of yester years. I would love to see past ideas that you have done.
I am new to the blogging world and would love some visitors. Come over and visit me and if you like become a follower.
This is such a cute idea! I think I will have my kids do one each.
If you'd like to link up this post to Theme Party Thursday over at my blog, I'd love to have you there!
-Jami
love it, now following you
Very cute and meaningful!
So cute! Where ever did you find the clear "plastic" shatterproof balls?
They are at Michaels—gotta search a bit for them. They have many shapes available…
Cute idea! I love the personalization.
This ideas is incredible! I so want to make one of these! I even included this idea in a roundup of homemade ornaments for kids to make – lovely inspiration you have!