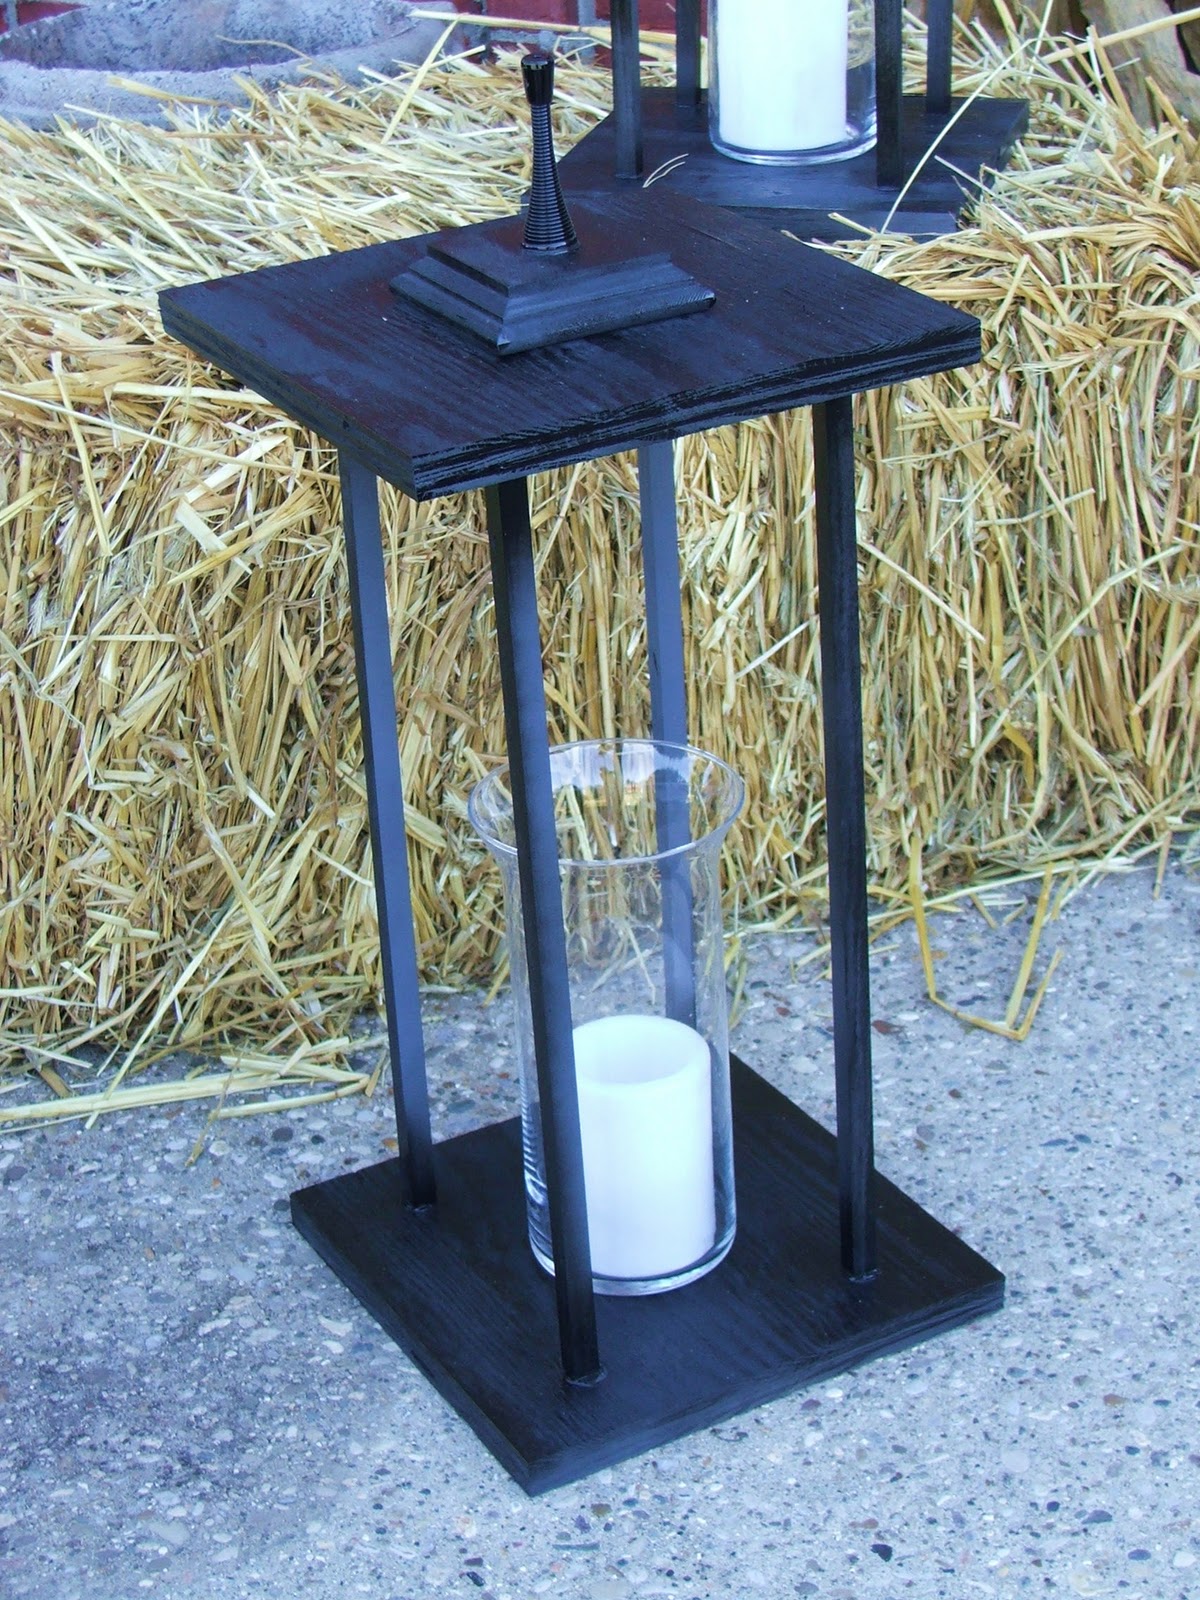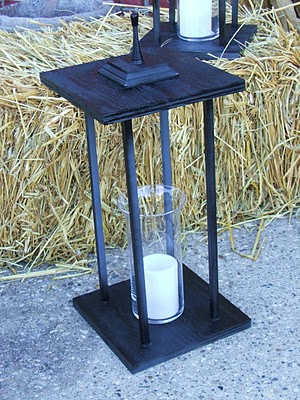
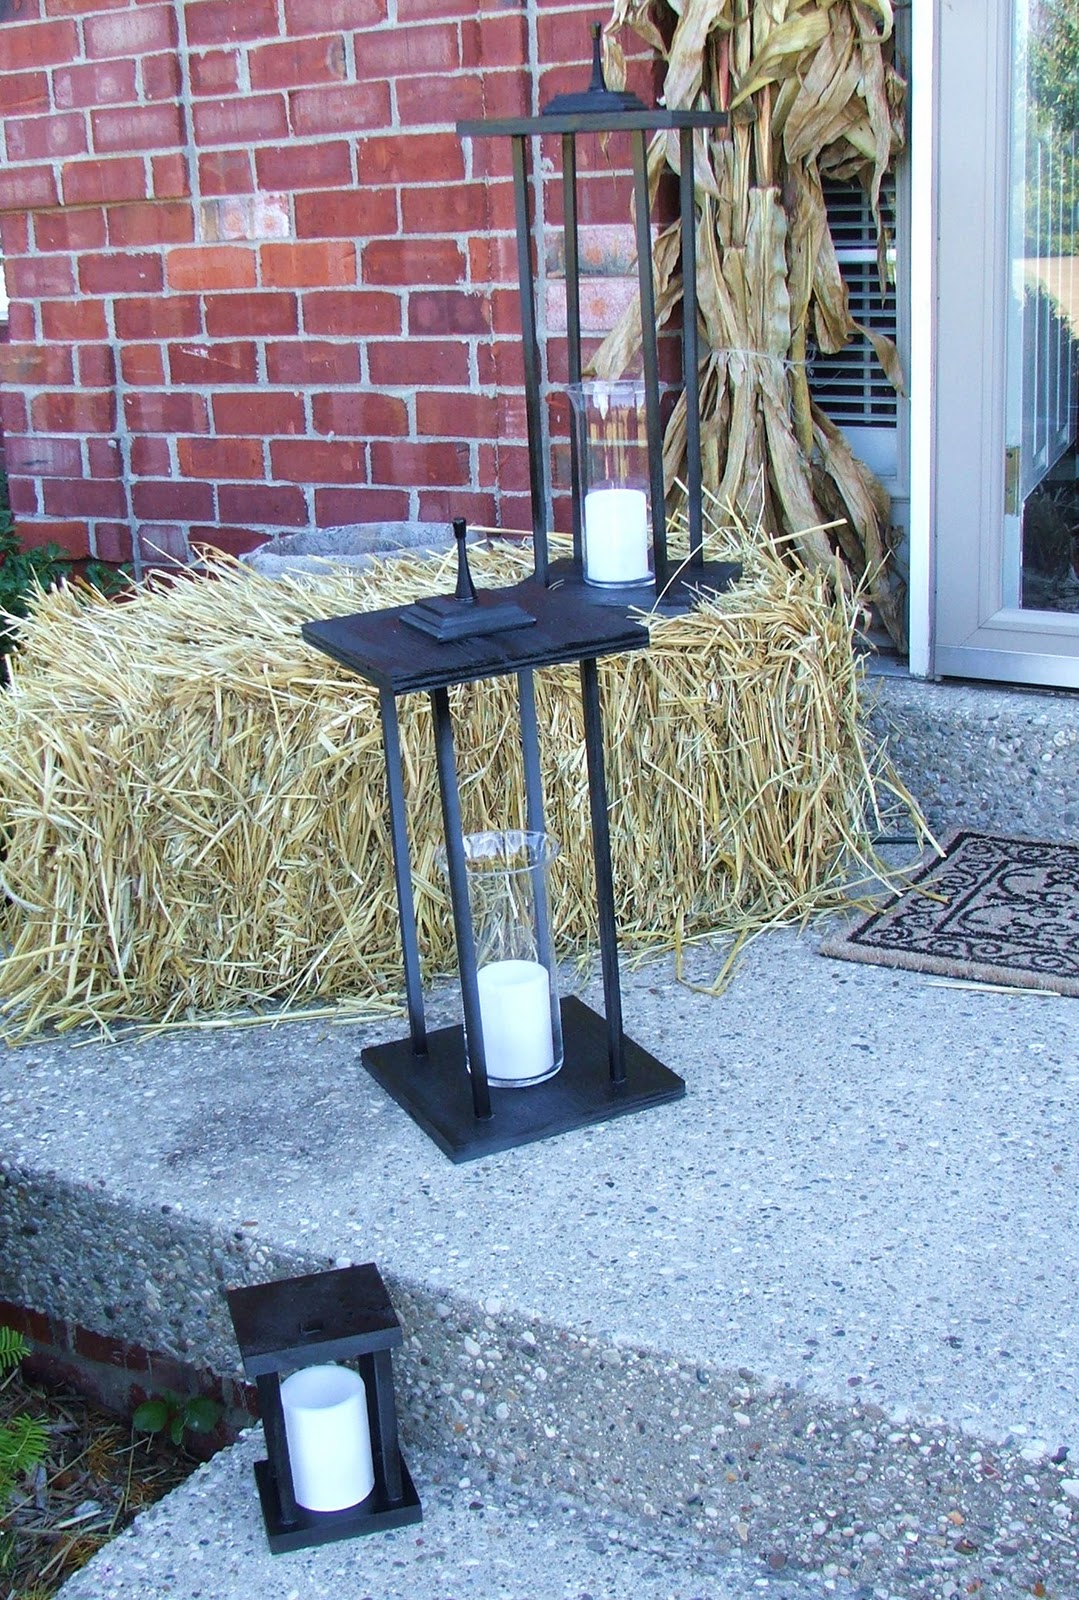
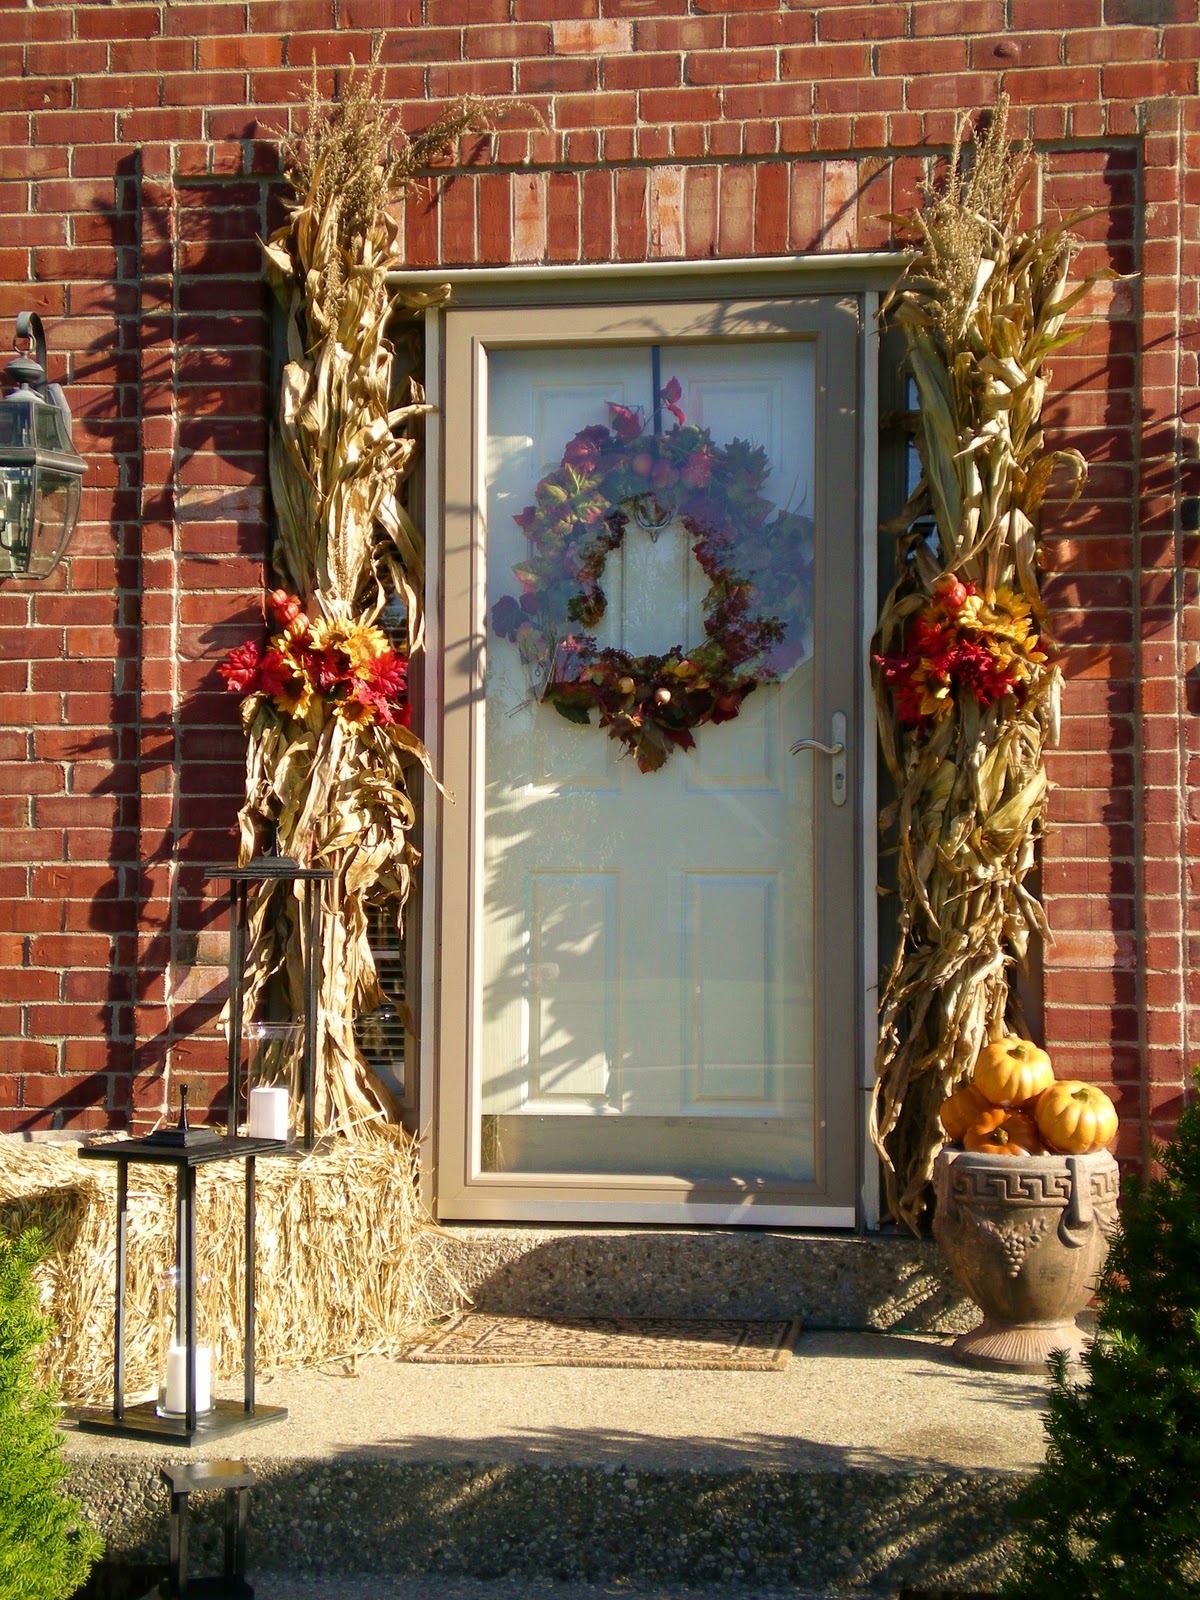
So I am a bit obsessed with those super large, cool, black iron lanterns that Potterybarn has in the newest fall catalog. But, I am not willing to fork over the $150 +++ bucks to just have them sit on my front porch. I needed to figure out a way to create that look on a budget. Here is what I have come up with….
Total spent is about $20….some supplies I already had. I bought 6 square dowels from Lowes. I had scrap wood at home to use for the tops and bottoms. The sizes are 10 inches square for the tops and bottoms. You will need to pieces for each lantern that you make. The size is really up to you. Although if they are too tall the liquid nails has a hard time holding in place the wood dowel. I suppose if you are using these inside—you could get away with using hot glue—but it wouldn’t hold up to the outside elements.
I made 3 lanterns….mine are all different sizes. So I cut 4 pieces of 1/2 inch plywood into 10X10 squares. I cut a piece of mdf wood that I had laying around into two 5 inch squares ( for my small lantern)
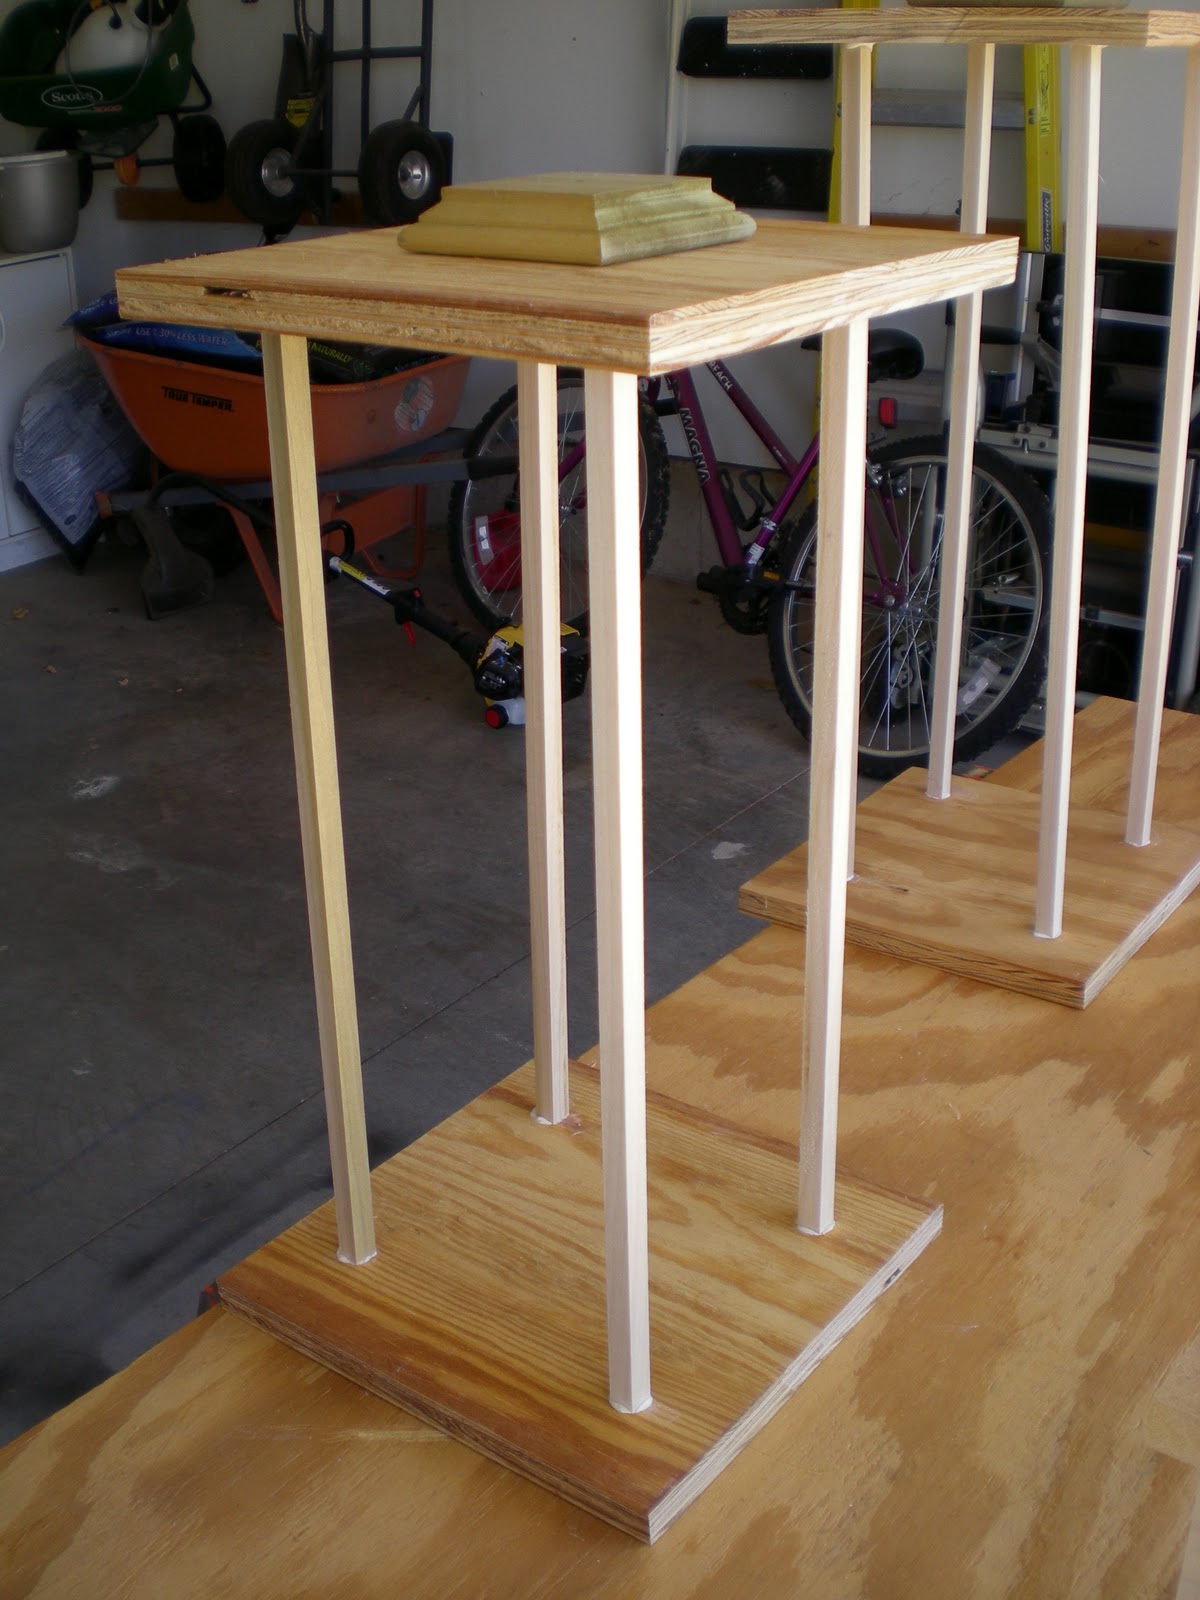

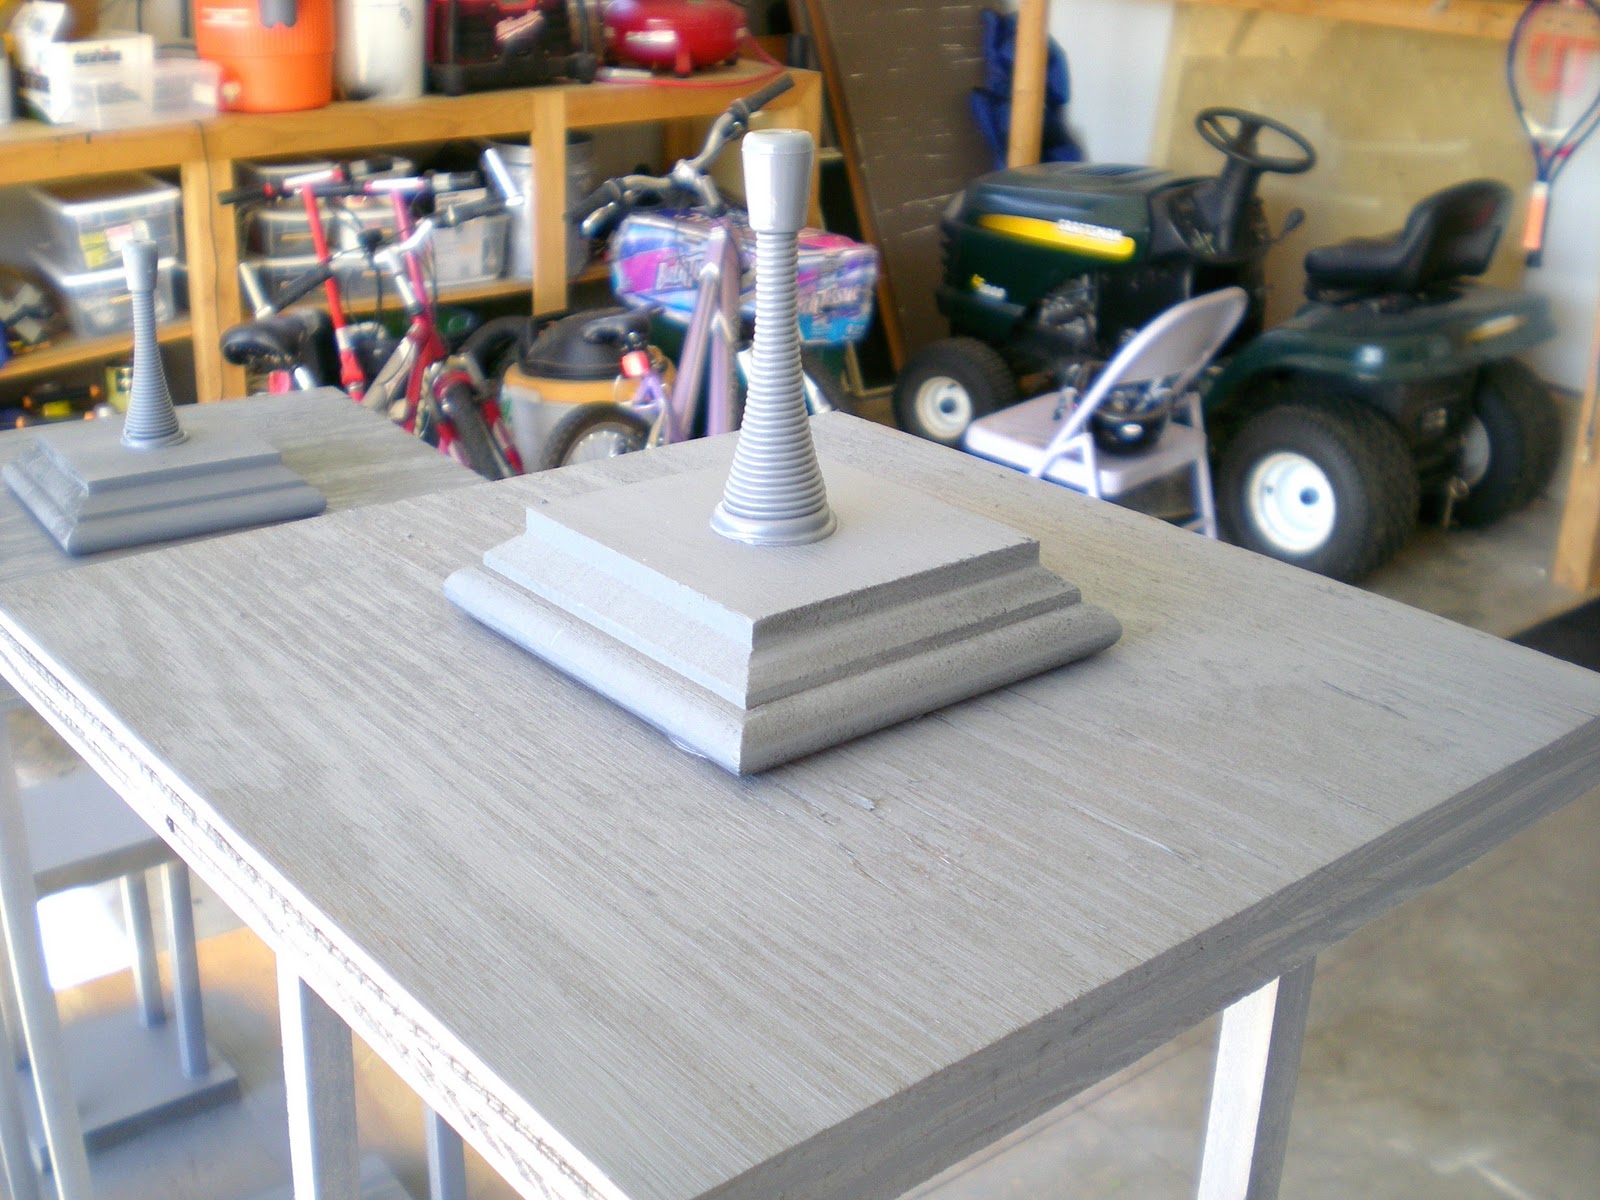
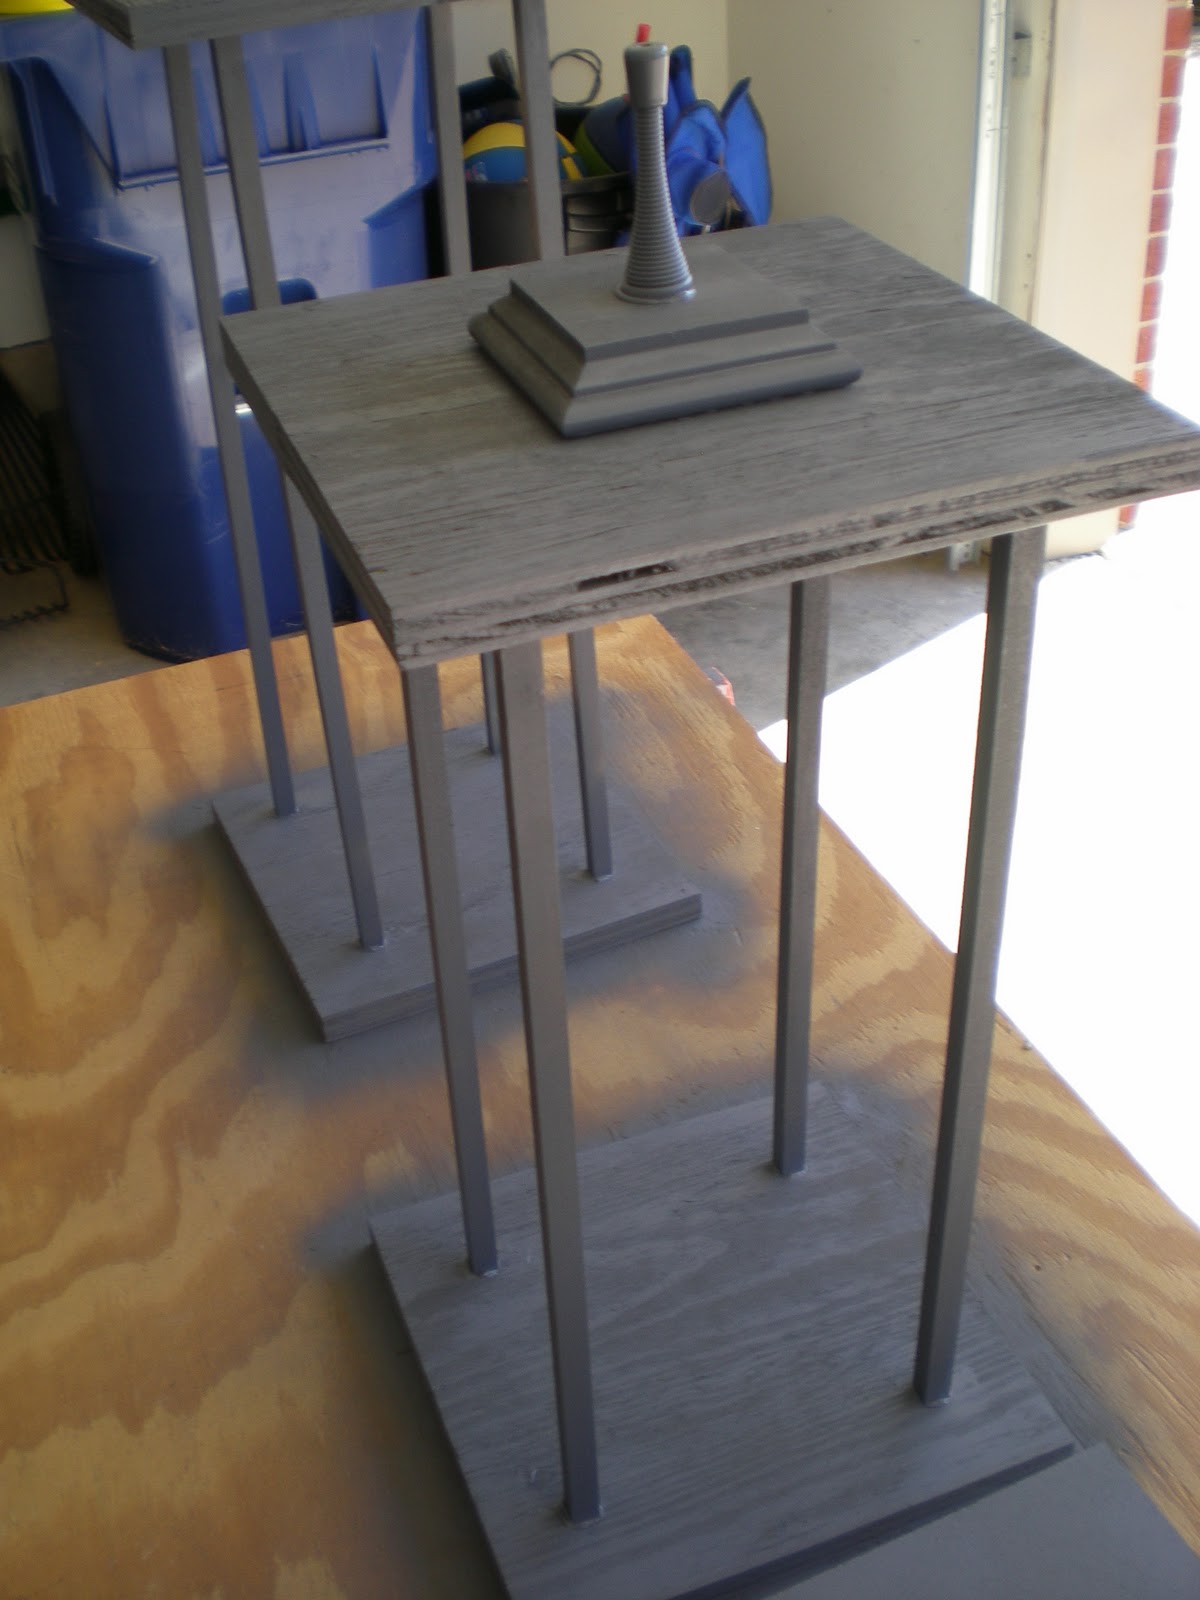
Then I began to put the pieces together (very excited!!) Grab some liquid nails (LOVE THIS PRODUCT !!!!) Makes everything sooooo easy! I placed my dowels about 1 inch in from each edge. Place a dollop of glue on one end of the dowel. Hold in place on the base of the lantern. You may have to hold it steady for about 20 seconds….then you should be able to steady it and let it go gently. It takes about an hour to set hard—but let the whole piece dry over night to be sure. Finish gluing the rest of the dowels.While those dowels are drying, glue any ornament on the top of your lantern top piece. I uses a door stopper and a block of wood =) It all looks great once you paint it all the same color! Let those 4 dry for an hour before you glue the top on. After an hour, dollop again with the glue onto the tops of the dowels and set in place the top of your lantern. I waited an hour to prime it grey—and then another hour to black it gloss black.
So what do you think??? Is your eyed fooled into letting you believe this is from Potterybarn????? But hey, for about $20!!!!
I finished my out with a couple of glass containers from the dollar store and a fake candle. Since we have a spot light on our door at night—the candles won’t really matter. But….if you wanted to you could use candles inside a glass jar—that would look awesome!
Some other ideas—-maybe make a few for a dining display or maybe a mantle??? Or paint them different colors (bronze, or metallic or gold….) Share with me what you do! I love to hear!!!