Well the sun finally came out and showed it’s face yesterday here in the Bluegrass….praise God! I hope it was pretty where you live. I’m hoping that we have finally ended the rainy season here in Kentucky. It really does start to affect your mood when every day it’s cold and rainy. I could never do Seattle.
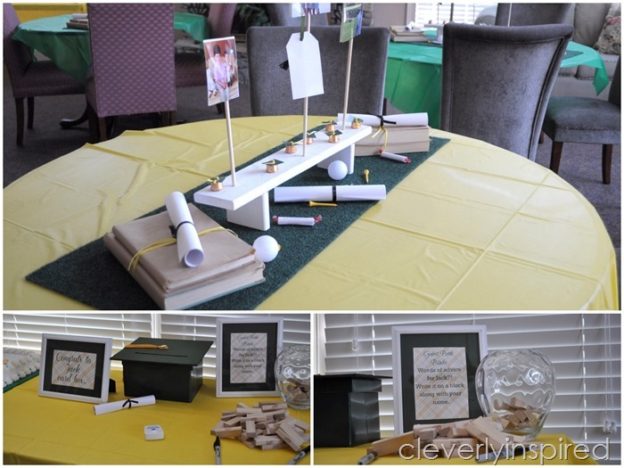
The graduation festivities were so lovely this past weekend. Friday we celebrated two of our friend’s sons graduations and yesterday with my nephew’s (sorry if my apostrophes are wrong there…#aintnobodygottimeforthat;) The tables were a big hit…

…. and now all of those things will be used at other peoples parties in the coming weeks. It’s nice to just pass it on…. it’ll get used a bunch!
I wanted to pop in today and share with you a fun little craft that you could do this summer or even maybe if you had time to make some for the favorite teacher in your life. I love when you can use scrap fabric to create something new. These bracelets are only limited by your imagination and they come together really quick. It’s also perfect beginner sewing project because all you need to know is how to do a straight stitch. I’m actually selling these on my etsy page if you’re interested in just purchasing some in your favorite colors (on sidebar.) ")
All you’re going to need for this project is a 20inch X 1.5 inch piece of fabric. If you want to measure your wrist first and just double check the measurements. I typically make mine between 20 and 21 inches. The fittings that I used I found at Michaels.


They are a small ribbon clamp with ring (see above), a jump ring and a magnetic clasp….

…these make it very easy to take on and off. I make mine so that they will wrap around a typical size wrist 3x. If you have very tiny rest you might want to go down to 19 inches and maybe up an inch if you’re making it for a wide wrist.
")
I did not do a real good job at photographing the fabric prior to sewing but if you iron the long piece of fabric and fold both long sides in a quarter of an inch, iron flat. Then you’re going to fold that whole long piece in half again and iron and sew along the longest side. You can iron the ends flats. I used needle-nose pliers to crimp the ribbon fitting onto the ends of the fabric and then attach a jump ring to both ends and then your magnetic clasp.
")
I hope that makes sense;) Once you get started making one you’ll want to make a whole bunch. They are fun to stack up….great little gift toppers. It’s also maybe a great little business for a beginner sewing child in your family that might want to earn some money this summer. Encourage them to set up a bracelet stand along with their lemonade stands;)
Go forth and sew!
xo