Happy weekend friends! Hopefully it is warming up where you live and you can get out and about….or maybe make this really cool DIY Art Cart:)
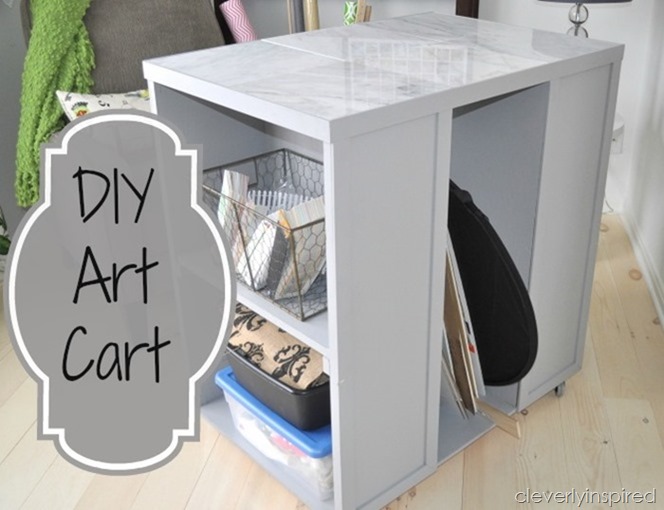
I looked around for a “rolling island” piece of furniture for my office but kept coming up short. Hubs and I designed one out on paper and decided to build it ourselves. The goal was to have a place to store photo back drops, have a nice smooth surface to craft and take photographs, have some storage on the sides and be able to roll around to make best use of sunlight in different parts of the house. This art cart is the perfect solution for my new office. Here is the gist of how we put it together….trying to channel my best Ana White with the details folks…wish me luck…
")
We used birch 1/2 inch plywood for the top and bottom. The sides are pine boards (1 by 12). The top and bottom pieces are 3 feet by 2 feet. The goal was to make the top the perfect size to fit 6 pieces of 12 by 12 Carrera marble. The finished table dimensions are 36.5 long, 24.5 wide, 39 high. It is a great size for my space.
")
Supplies: (you can find many at your local True Value:)
(2) pieces of 1/2 inch plywood cut 3 by 2 (top and bottom)
(4) pieces 1 by 12 pine board cut to 35 inches. (This will make for a finished table height of 39 inches tall once the wheels are on)
(2) pieces 1/2 inch plywood cut 24 by 35 (for the back of the shelves…1/4 inch plywood would be ok if you weren’t using a real heavy tile…the center helps support the top so just FYI)
(6) 12 by 12 marble tiles (I used Carrera)
(2) pieces 1 by 12 cut to 22.5 inches for the shelves
(4) wheels for weight above 200lbs
About 40 feet of trim (we used 1 inch wide flat pine)
Basic Steps:
- Using nail gun…secure pine board to the top piece.
- Flip over and nail in the bottom.
- Flip unit back over and measure for shelves. Our shelves are 17inches from bottom. Place 1 x 2 and secure with nail gun. Repeat with other side.
- When you double check the unit is square…secure top and bottom with screws.
- Install back of shelves with screws.
- Install trim around top perimeter (dry test the tiles to fit) Our trim is flush with the tiles so install accordingly.
- Trim out front and back.
- Paint (I used left over paint which is Stonewall Jackson Dutch Boy Paints (left over from Powder Room)
- Place 6 tiles…my fit tightly so I did not need to glue. If you have some wiggle room just use some construction glue to adhere. If you would like….you can seal your joint with a clear silicone.
")
")
I know these directions are not the greatest…if you have any questions just email me or find me on Facebook ;) I will be happy to help.
Are you going to make one??
More about the office/craft room here:
")
Where I share great ideas:
BeDifferentActNormal, The36thAve, Whipperberry, TipJunkie, Tatertots&Jello, TodaysCreativeBlog, SerenityNow, PositivelySplendid, IHeartNaptime, ByStephanieLynn, TheDIYClub, CRAFT. MadinCrafts. HomeStoriesAtoZ, NotJustAHousewife

This is fabulous Traci!! That room is absolutely incredible!
Amazing piece and a fabulous room!
Love this. Pinning.
[…] space. A lot of DIY blog and Pinterest scouring has been happening and bright ideas like this DIY art cart are only adding to the pile of projects I hope to one day be able to take on. [Cleverly […]