We (we meaning Bill and I) started for some odd reason collecting wine bottles. Not sure how it started, I am sure I was thinking I would do something with all of them. I love all the different labels and shapes. So, we grew quite a collection. It was time to do something with them. This is what I thought of….
We have a lake cottage (I say cottage, some say cabin…) It is secluded and in the woods and on a beautiful lake. It is a piece of heaven on earth I tell ya. Anywho, I had this thought for a thrifty but very quirky and fun garden border. How about we use all those wine bottles???? Huh hon, what do you think?? He is so sweet–because even if he thinks I am nuts….he goes right along with me—-and helps me too!
Love that guy;)
So here is what we did…
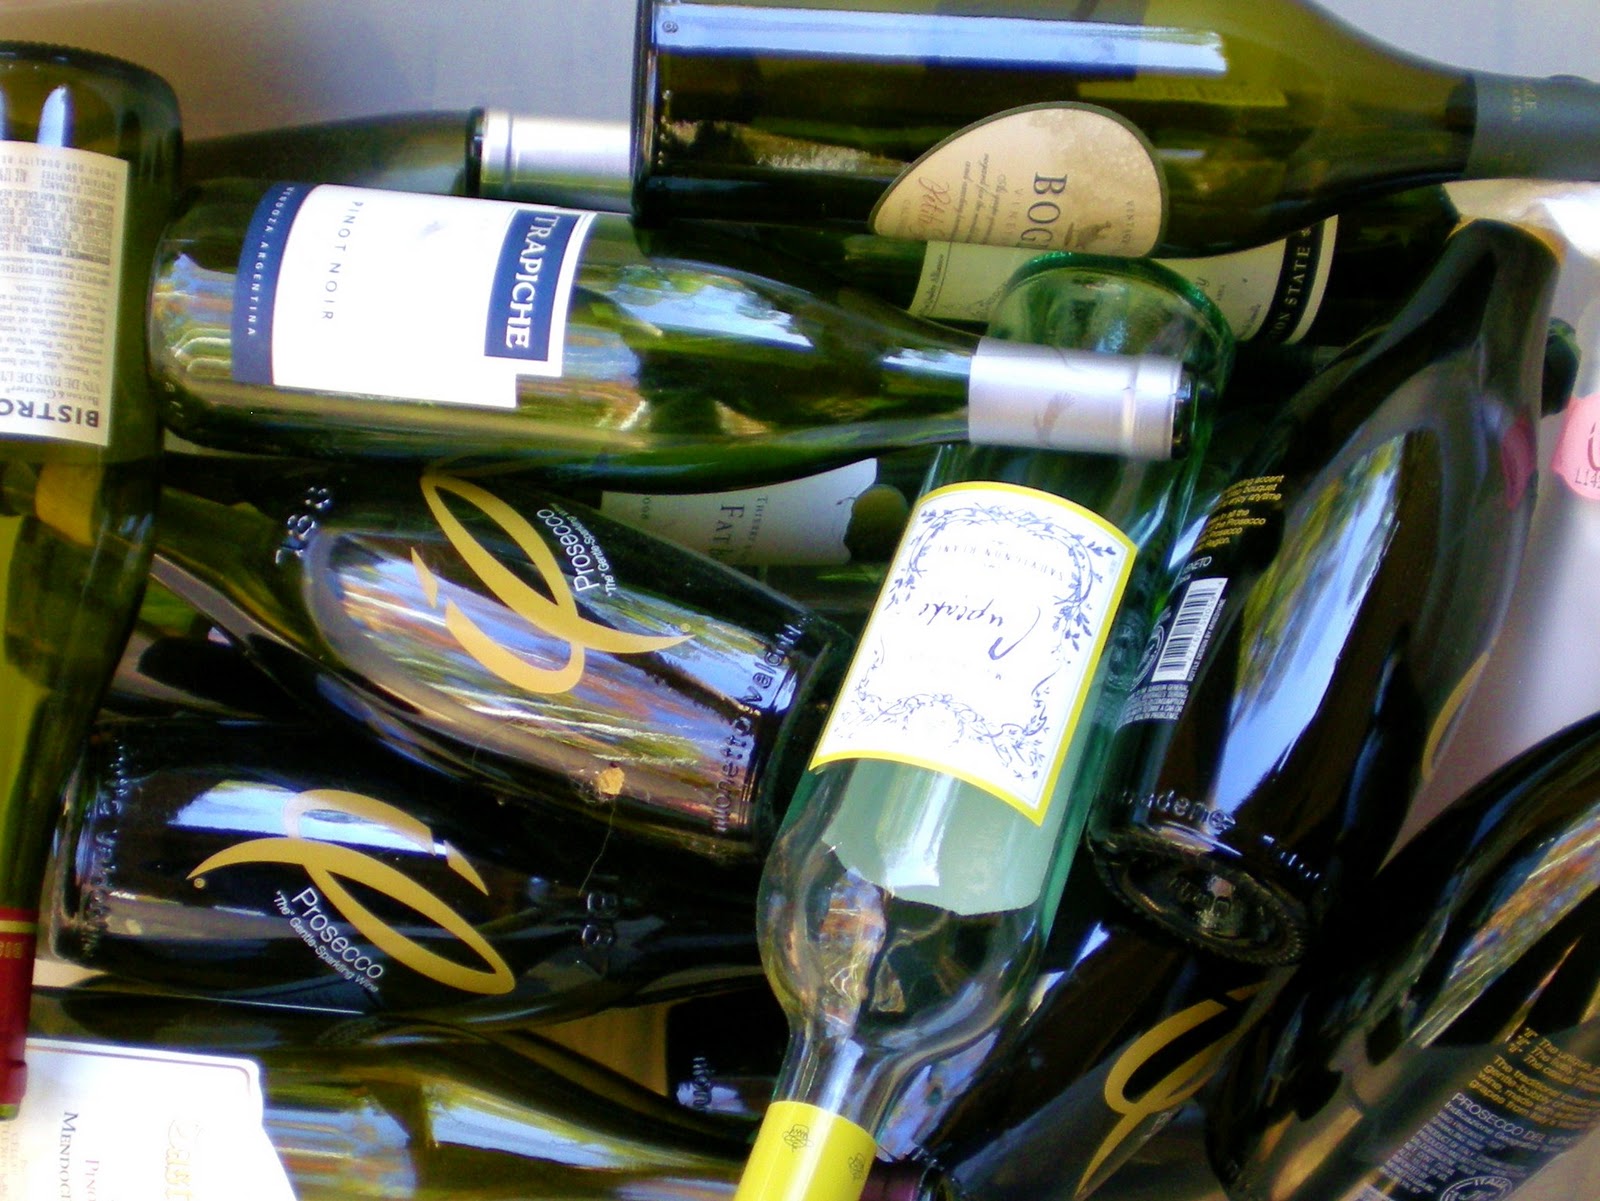
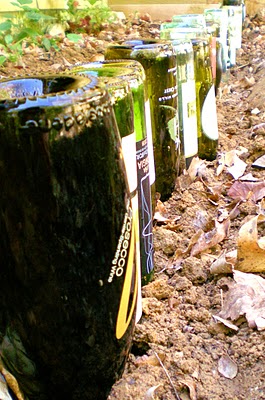
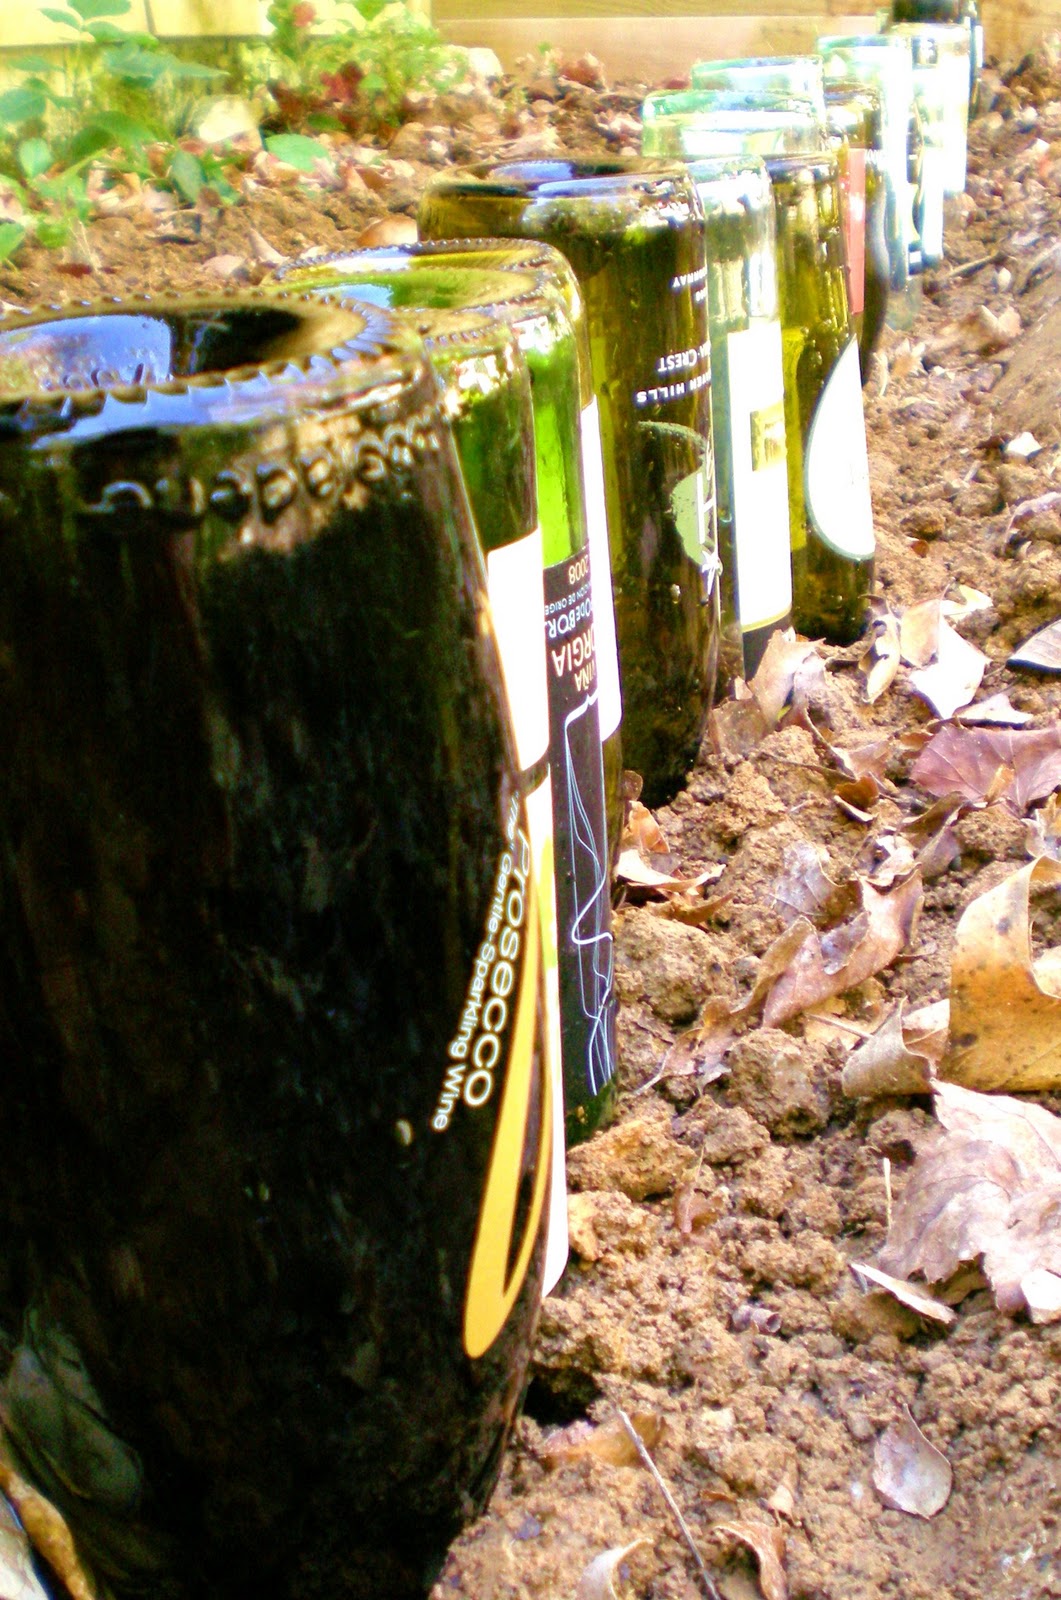
Started with several bottles…all different heights and labels–love that!
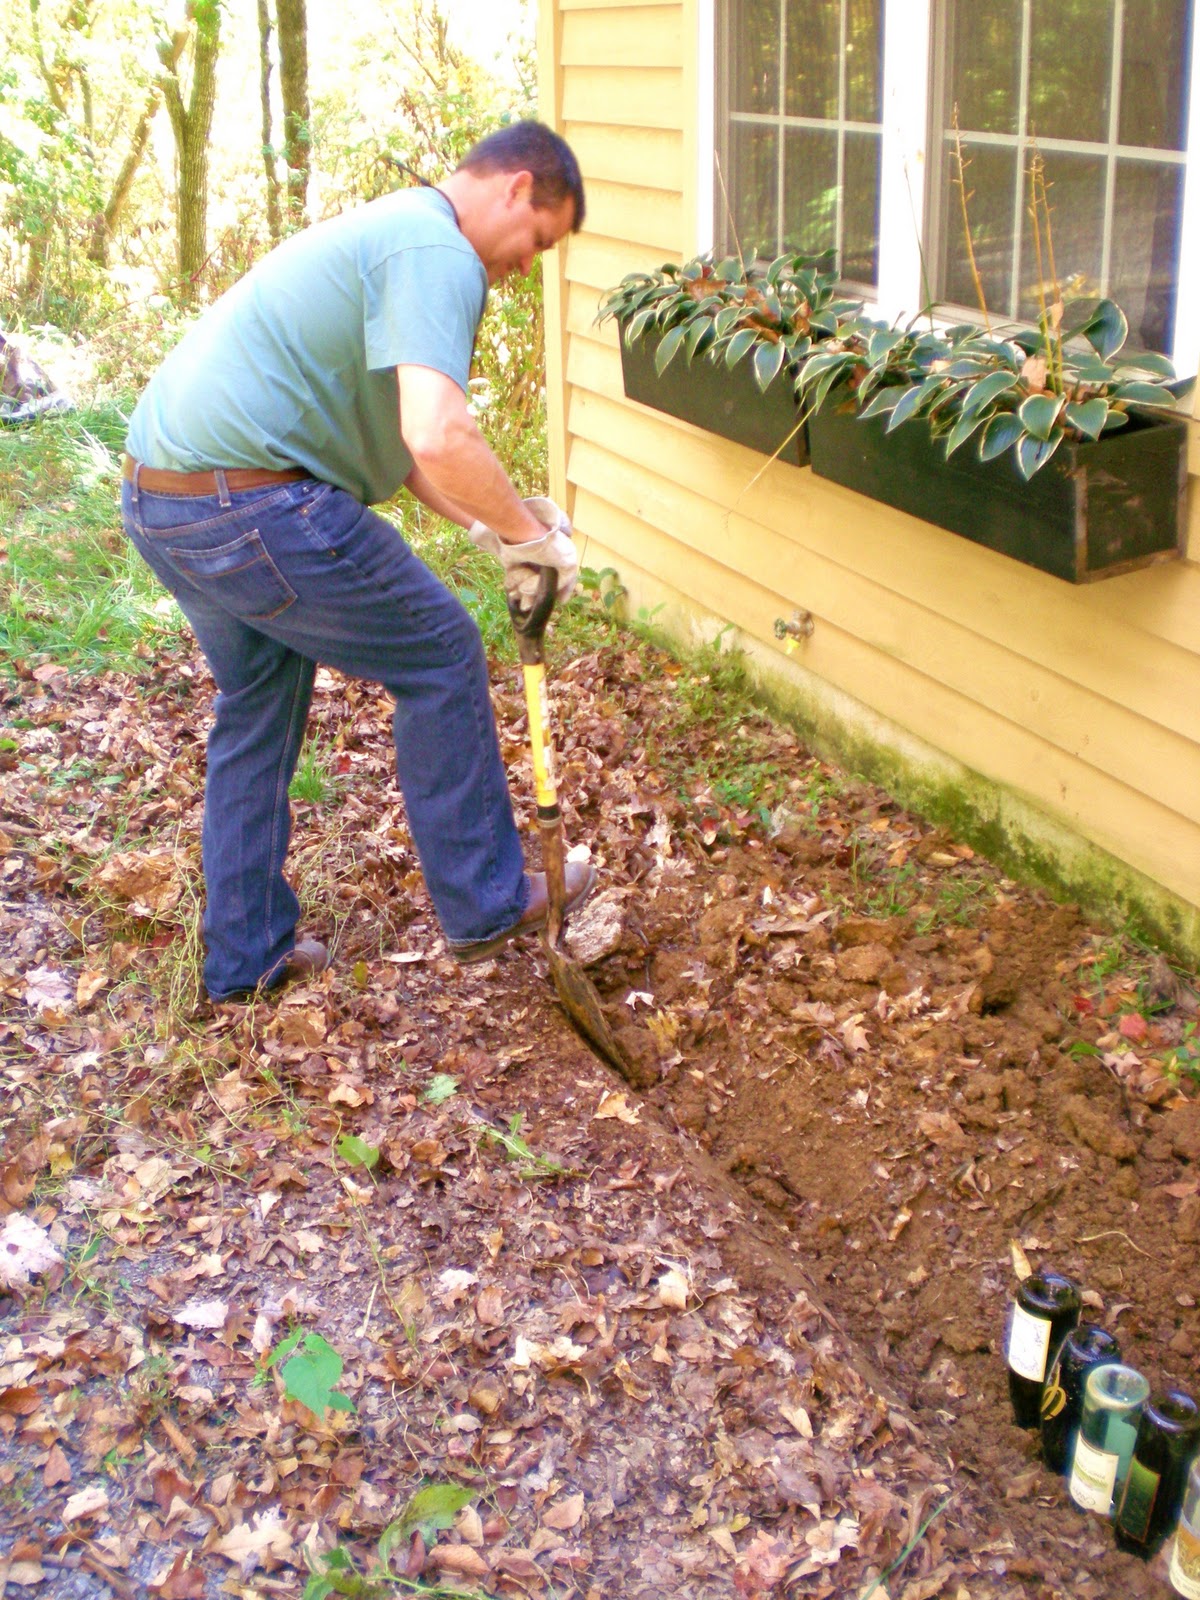
We ( and by we I mean Bill) dug a trench about 2-3 inches deep. I wanted to bury the bottle about half way to ensure they would stay put.
He is so happy about his first appearance on the little blog that I can’t shut up about…
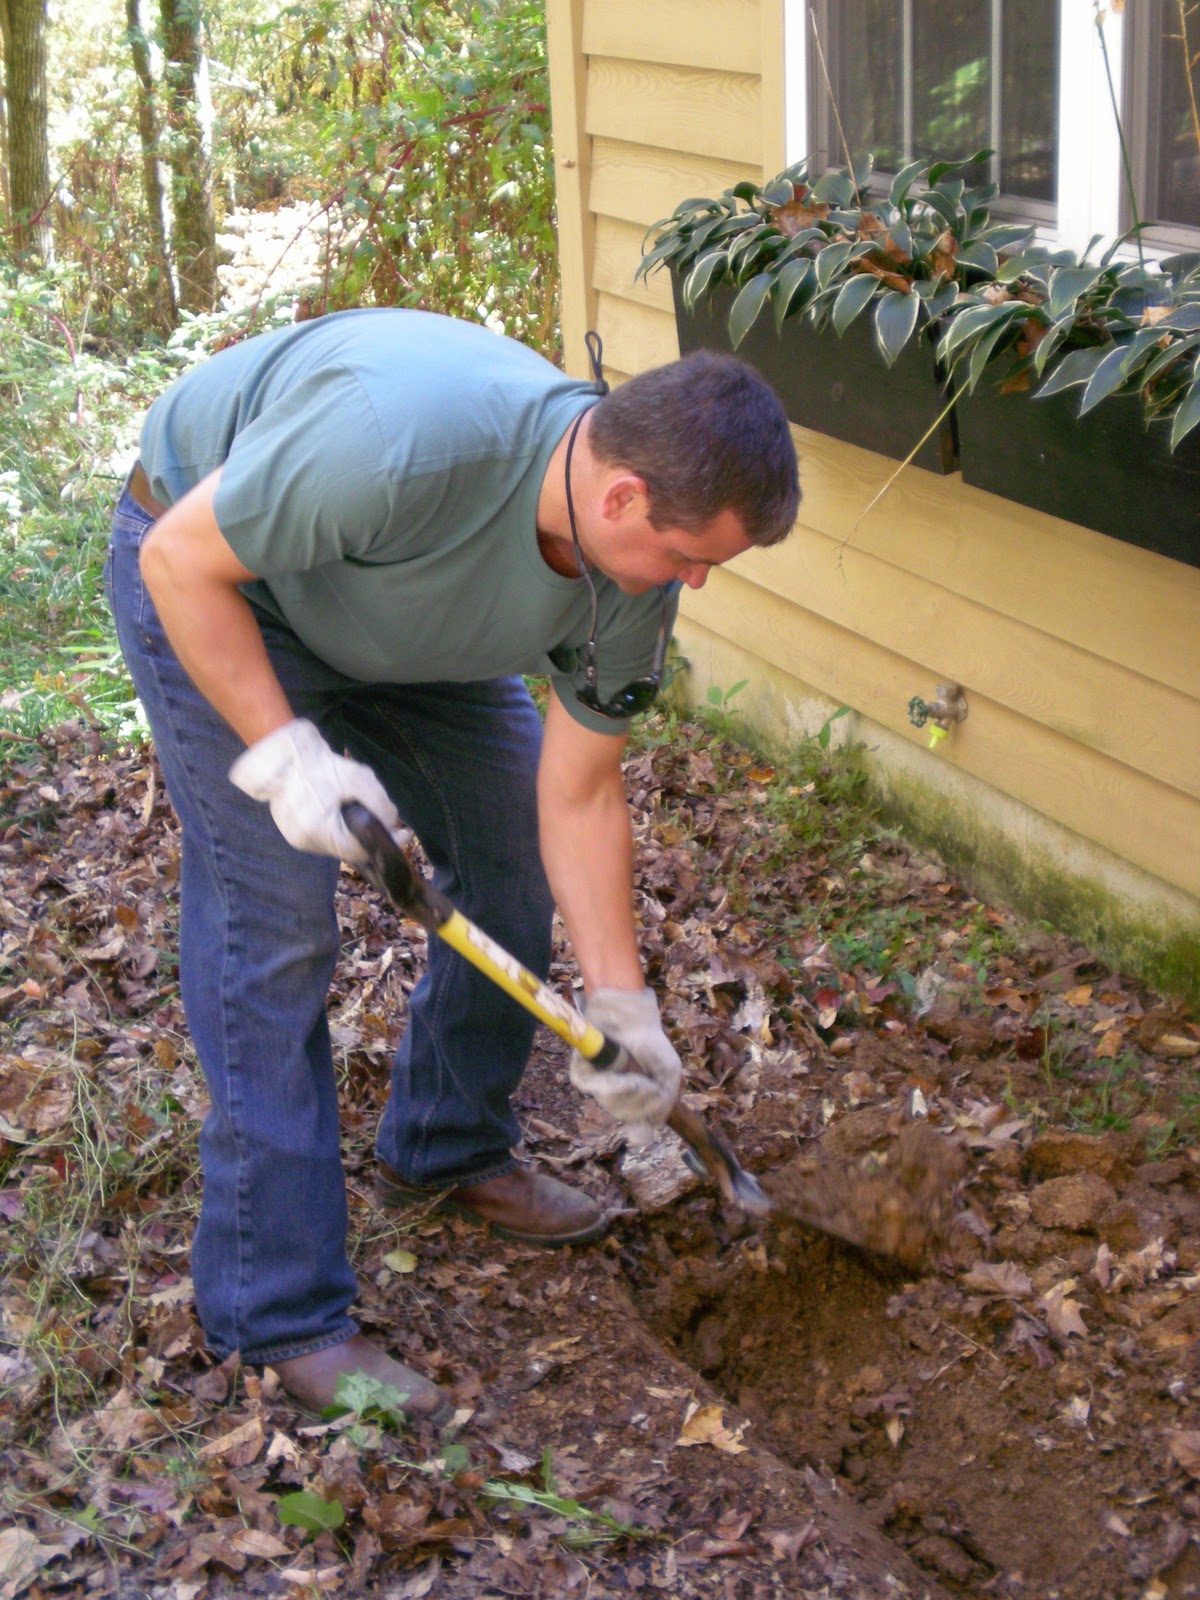
Such a honey ;)

yes honey….can you keep digging…I have many more bottles…love you ;)
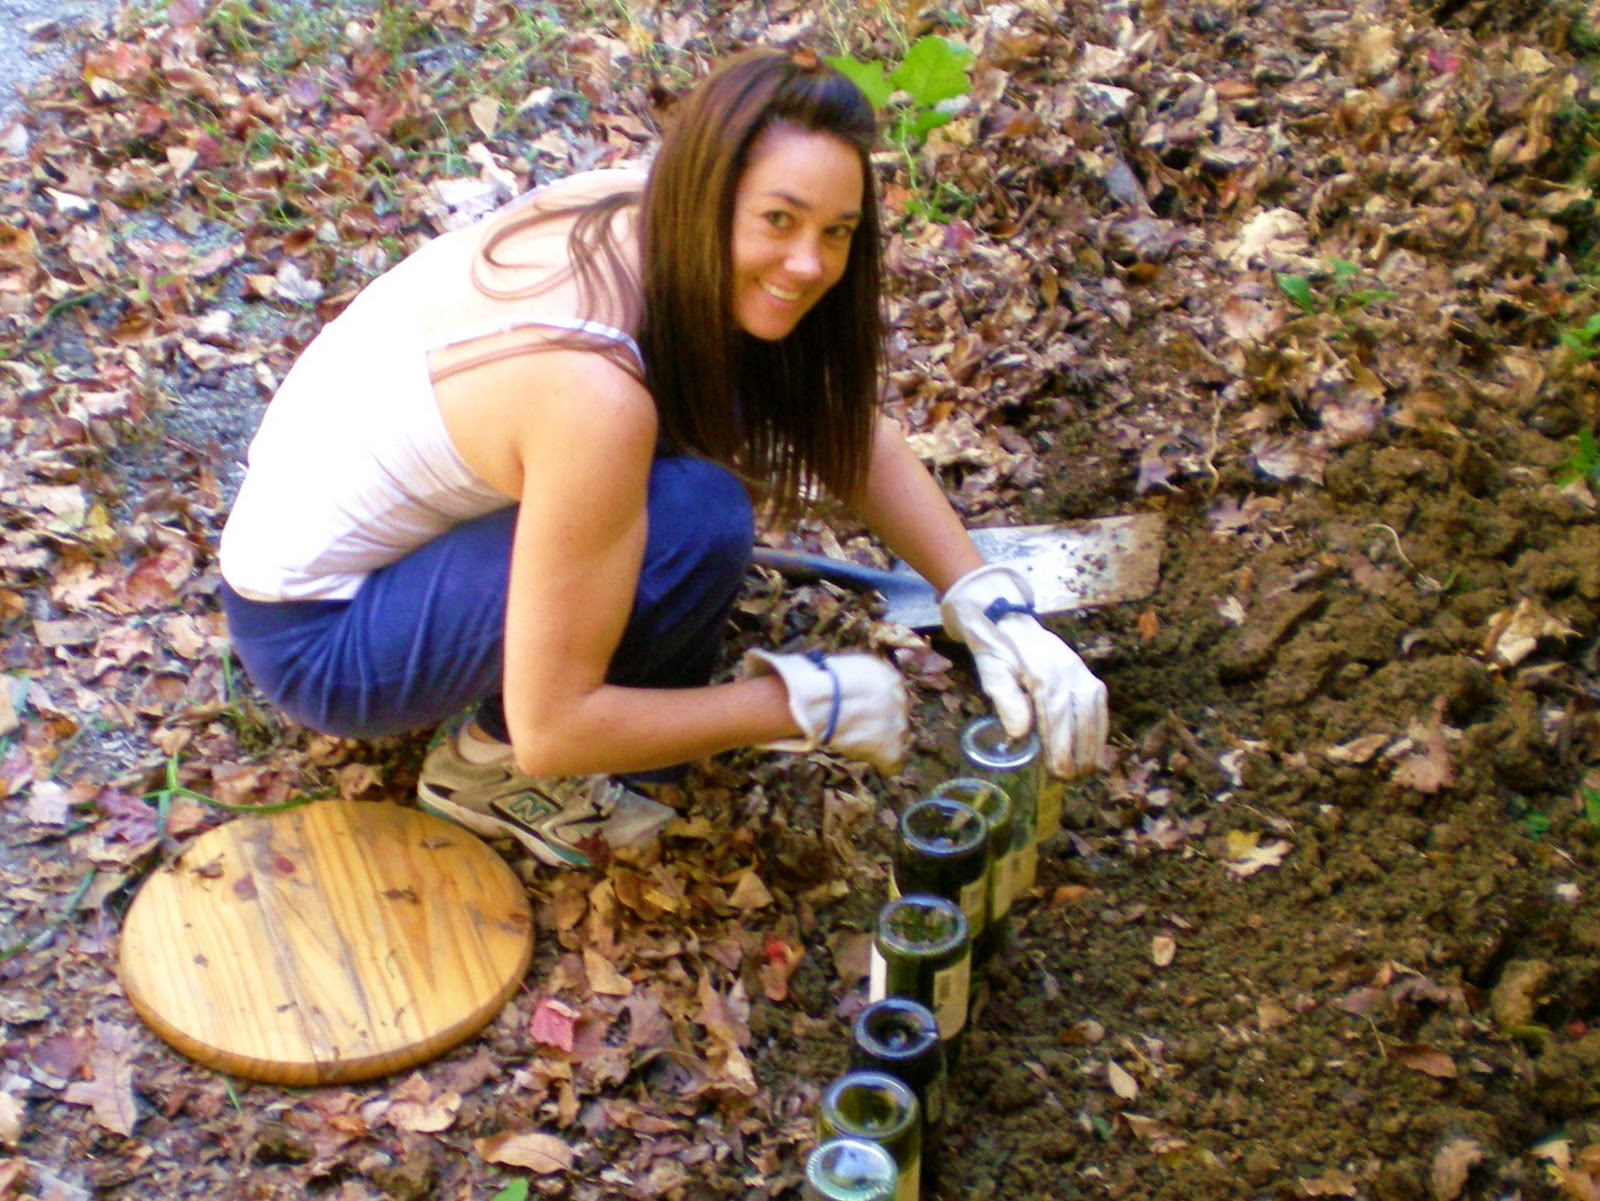
So he kept diggin, and I kept securing the bottles in place. I kind of let it just happen—just trying to not place bottles that were the same right next to each other.
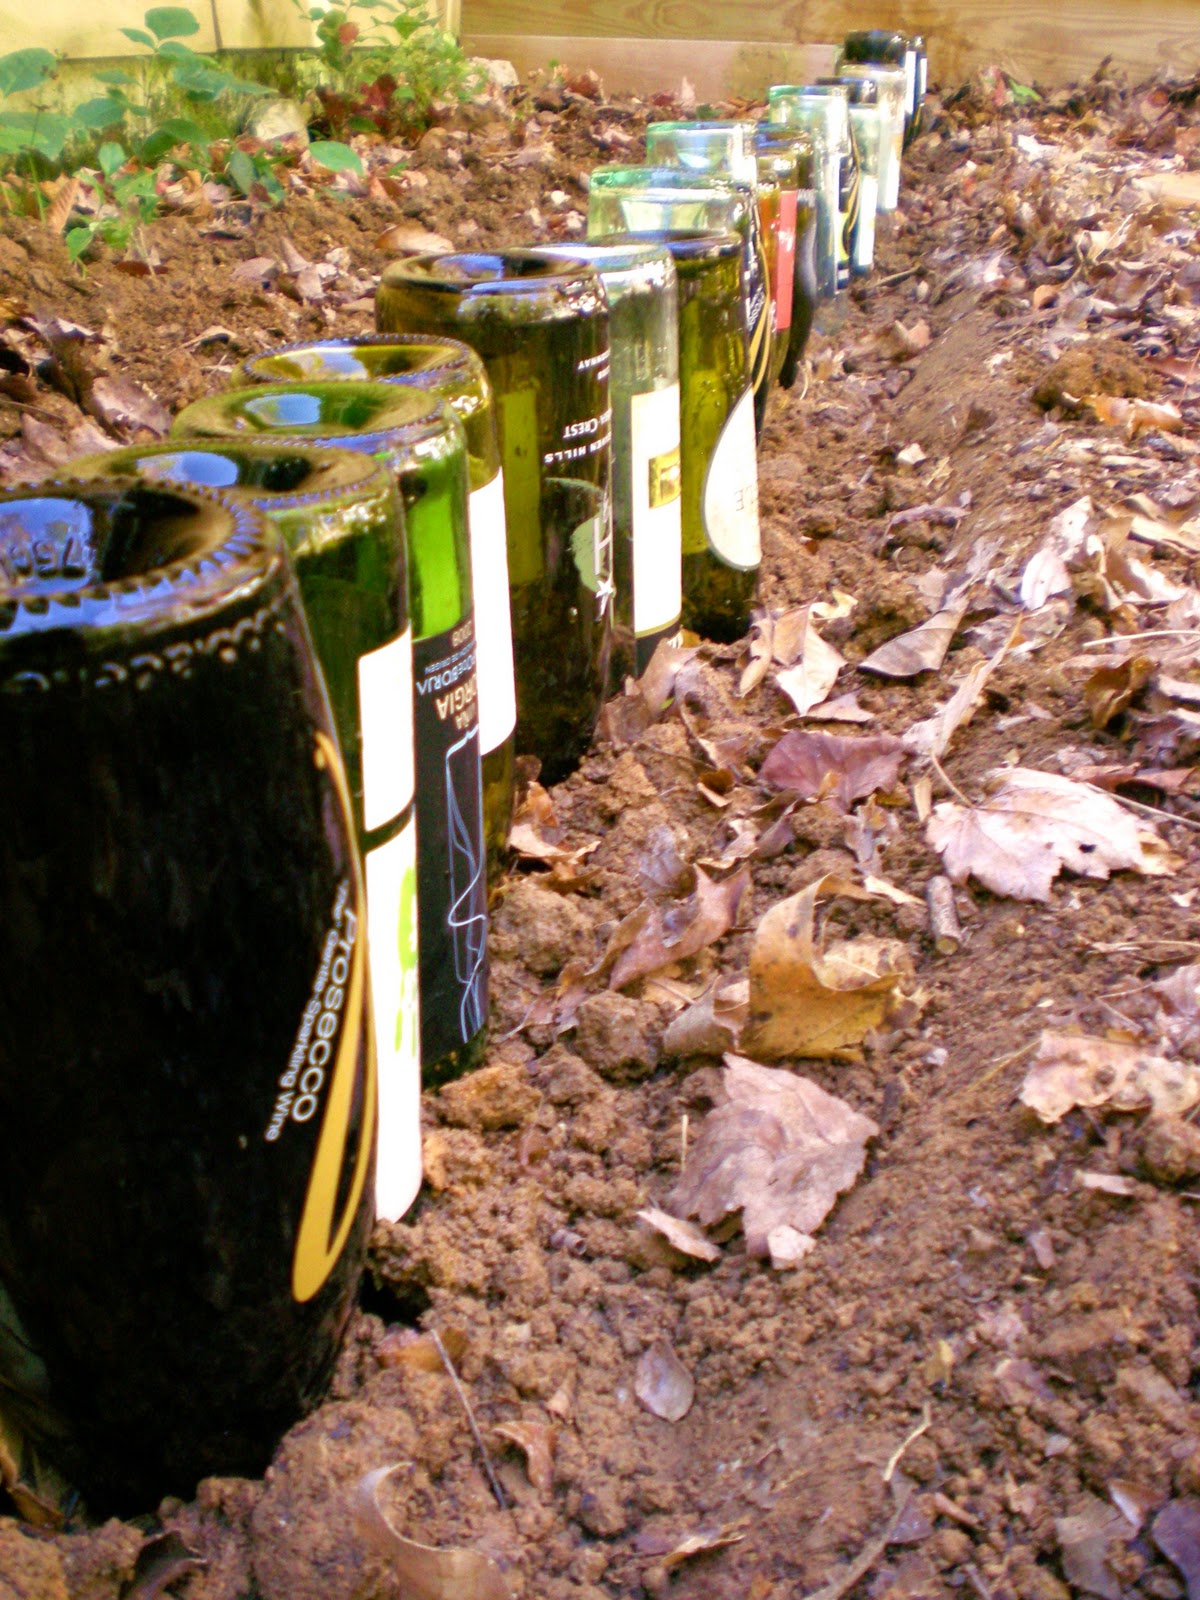
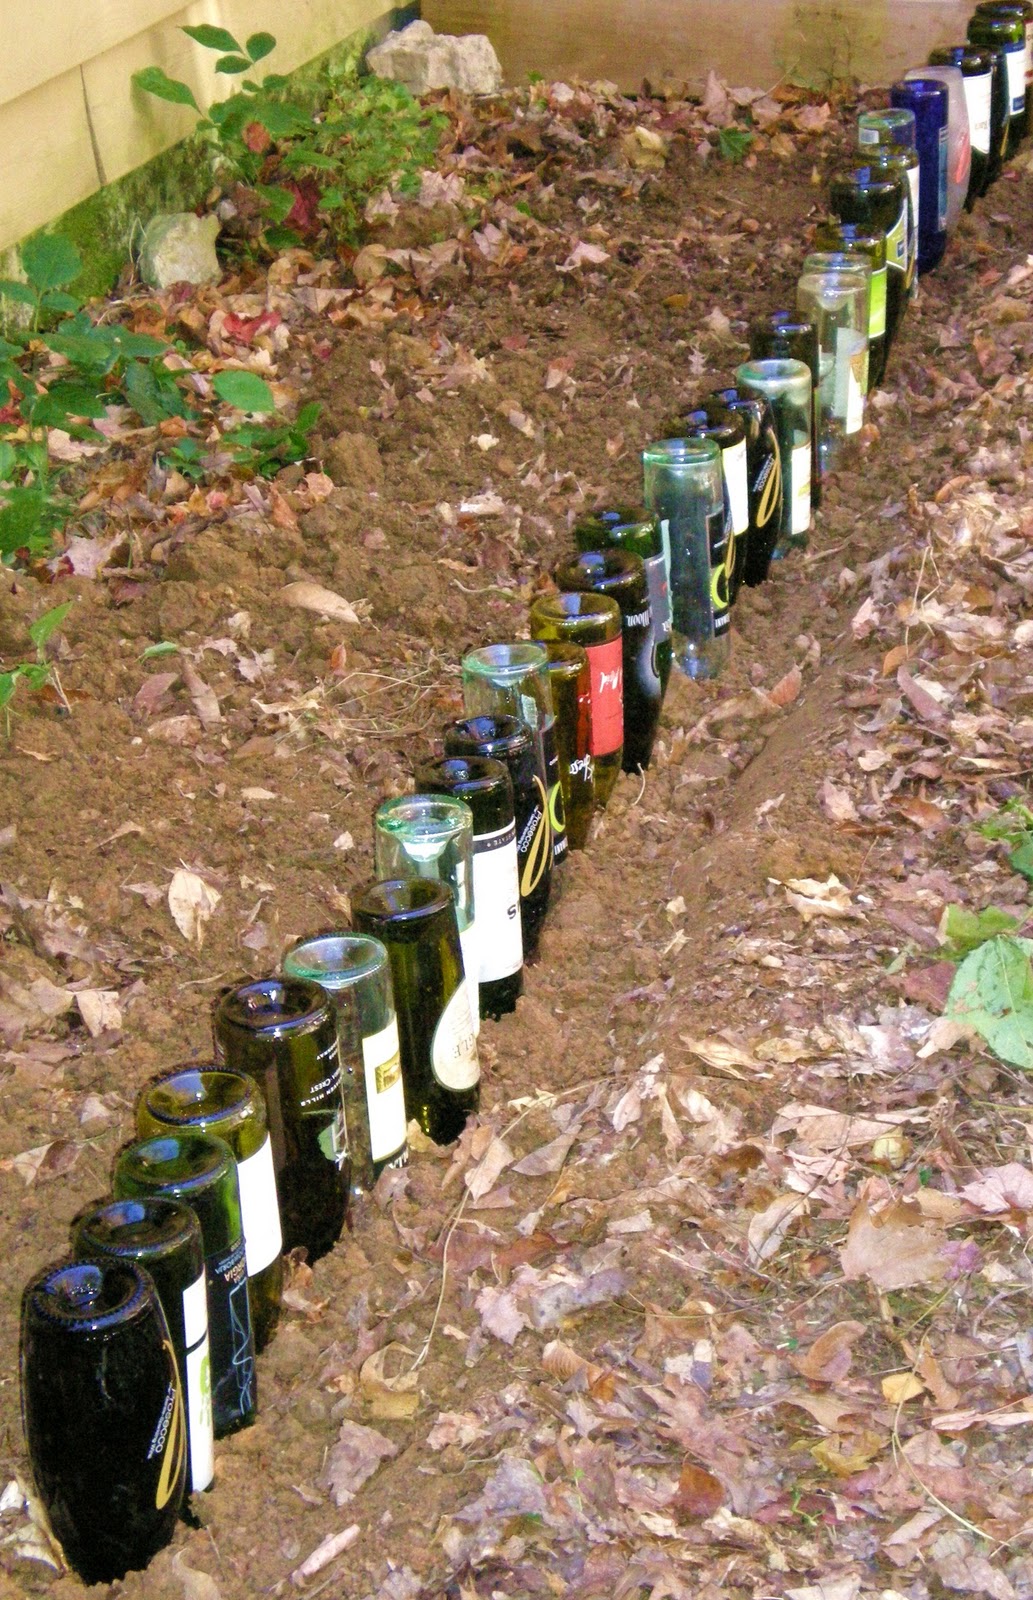
Imagine some pretty new mulch behind the bottles ;) and maybe some pretty landscaping!

We are off to drink more wine so that we can finish our border! (not him, he sticks to bourbon; he is from Kentucky so it is sort of the law here ;)
See the newest video link to do another fun project with left over wine bottles….
Be inspired to be clever!
Oh, and you like what you are reading would you mind sharing with a friend—and become a follower?? Thanks a million ;)
Sharing today at these sites….


Sharing at Madincrafts

oh ok that I like. Its completely quirky, fun and DIFFERENT!
Love it!!
~Tana
What a great idea! I recently found a wooden wine rack at a yard sale and am starting to collect bottles, but now I might just change my mind about what to do with them :)
Love your idea, I hope the labels don't come off. But what do I know I live in Seattle it never stops raining here.
Raising my glass to you.
ha! that is great! definitely thinking outside the ummmm…BOTTLE!!!
I saw this done on a DIY show a couple years ago but never could collect enough wine bottles to try it! Yours is slightly different because on the show they buried them at different heights, or used different sized bottles – or both! Plus they warned that the bottles must be filled with sand to give them more strength to prevent breakage and possible injuries.
Good work!!
Tracie, This is a fantastic idea and I love the whimsy it adds to your garden beds. Love it! Thanks so much for linking to The Sunday Showcase party – I greatly appreciate it. I have featured thison my first round of showcases; please feel free to stop by and grab a featured button. Hope you are enjoying your week! ~ Stephanie Lynn
wow what a totally different and great idea! I likes it very much. I went to a restaurant with some friends a few weeks ago and they recycled their wine bottles into water glasses. very heavy and sturdy i thought it was very cool.
I hope you kept all the corks as well! I'd love to come help you empty out some more wine! ;-)
Haha, what a cool idea!
I think I see a future blog hop on "what you can do with wine bottles"… I'm a new follower. Found you along the way. laura
visiting from http://imnotatrophywife.blogspot.com
I love it!!!! I have done the same but with old china dinner plates! How cute will it look when I add the wine to the dinner party in the garden?!!??!
Thanks for sharing, I'm a new follower!
Kaye
I've done this for a border in our yard. You can add tea lights to the little dip on the bottom of the bottle for a romantic evening touch too!
I've seen an idea similar to this before and I love it. What a great way to recycle and have a border that has some memories!
This is so clever! What a great up-cycle.
Thanks for sharing.
Now I wish I was a wine drinker! I have seen these borders before and they look fantastic. You will love it!
Brenda
wow, how neat is THAT! i have never seen anything like that, and that's not easy to say with all the fabulous ideas in blogland! i think you may rock.
We have this in our yard! I put the bottles in to border a pathway. You can see a pic on my blog under the "Alfresco" post. I'm stopping in from Centsational Girl.
Hopping over from Censational Girls Outdoor Party. Hope you enjoy my 'patio time' post. (link #205)
Such a fun wine bottle border. Congrats to your honey for making it into your blog. I am such a wimpy wine drinker . . . it may take the rest of my life to get enough bottles . . . or I could just invite a lot of people over . . . because this idea is clever and whymsical.
Fondly,
Glenda
[…] Another clever Green idea is to turn ‘em upside down as garden border (tutorial included.) […]